Drum Comparison: Ion vs. Rock Band vs. Guitar Hero World Tour
I got my Ion Drum Rocker drum set delivered yesterday and set it up last night. It occurred to me after I’d played with it for a while in Rock Band 2 that I’d finally gotten a chance to play with all of the various gaming drum kits - the Ion, the standard Rock Band, and the Guitar Hero World Tour - and I should probably post a decent comparison since I’d not seen such a thing out there.
For reference, and so you know where I’m coming from:
- I was in drama in high school, not band, and I have no musical training.
- I primarily play Xbox 360, though my GHWT experience was on the Wii.
- I like the Rock Band game more than GHWT. The set list is better and I have a lot invested in downloadable content.
- I generally play on the “Hard” difficulty, though I’ll fall back to “Medium” if the song’s really difficult on drums. I’m not awesome by any means, but I can hold my own.
- The whole reason I started seriously looking at the Ion kit was that I put a hole through the yellow pad in my original Rock Band kit.
Rock Band Drum Kit
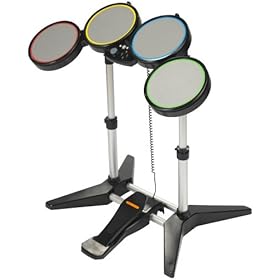
I had the Rock Band 1 kit up until a week or so ago. It’s decent, though the pads are really loud when you hit them so I have to really crank up the amp to get the music to be louder than the smack-smack-smack of the drum kit. I tried getting some of those rubber silencers they sell, but they didn’t work - instead they just absorbed the hits I was making so I would randomly miss more notes. (I’ve heard that these work better on the new Rock Band 2 kits than the original Rock Band kits. I haven’t tried that.)
Portability on the kit is good - you can pick it up with one hand and move it around, and it easily disassembles to go in your car when you need to take it to a friend’s house. This is good for putting it in the other room when you’re done playing so your living room doesn’t look like a studio.
The kick pedal doesn’t move around because it’s latched to a bar on the bottom of the kit. The downside of this is that if it’s not well positioned, you don’t get much flexibility on how it gets placed. You eventually get used to it, though. I didn’t have any of the problems with the pedal breaking like I heard some other folks having.
I never got 100% on a song - ever, even on easy - because the kit would seem to randomly not register notes. (How can you get 99% on Hard and never get 100% on Easy?) This was the most frustrating bit about this kit - I legitimately couldn’t tell, in many cases, if the calibration was off, if the kit was misbehaving, or if I really just sucked as a drummer. (Admittedly, I very well may suck, but come on - never once a 100%? Never?)
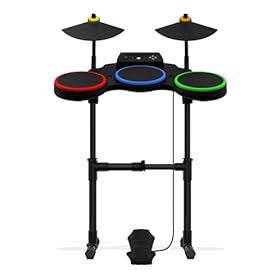
Guitar Hero World Tour Drum Kit
I played the GHWTkit over at a friend’s house for a couple of hours, so I don’t have as much experience with it as I do my Rock Band kit. The pads are significantly quieter than the Rock Band kit and I didn’t feel like I was missing any notes due to the kit - I felt a lot more confident that if I was missing a note, it was due to my own incompetence. (That sounds like a bad thing, but it’s not - I was able to tell where I needed to practice and improve rather than never quite being sure.)
The pads on the GHWT kit don’t have any real moving pieces the way the Rock Band kit does. The Rock Band pads sort of “float” and when you hit them the pad depresses, touches a sensor, and the hit is registered. The GHWTpads seem to be pressure sensitive in-and-of-themselves, so it’s a bit more like a real electronic drum kit. There’s also a little more rebound to them, which is nice.
The kick pedal on the GHWTkit felt much flimsier than the one on the Rock Band kit. Also, there was really nothing tethering it to the ground so it traveled all over the place while playing and I was very frustrated by having to reach down between songs and constantly reposition it.
The big/obvious addition here is that of the cymbals. Rather than leave the hi-hat as a pad even with the rest of the drums, it’s raised up, closer to the way it’d be in a real drum set. It changes the way you play and it takes some getting used to if you’re used to the standard Rock Band kit. Once you get the hang of it, it feels pretty natural and it’s nice.
I didn’t get a chance to play Rock Band with this kit so I don’t know how Rock Band handles the fact that this kit has five pads (three drums, two cymbals) instead of the four that Rock Band expects. I assume that you just don’t use the cymbal on the right when you’re in Rock Band. By all accounts the GHWTkit is compatible with Rock Band (and vice versa) so it deals with it somehow.
At the time of this writing, they don’t sell the GHWT kit by itself - you have to buy it with the complete band set for GHWT. I already have four plastic guitars and a mic - I don’t need more guitars or another mic, so this was a bit disappointing. However, it did give me an excuse to get the…
Ion Drum Rocker
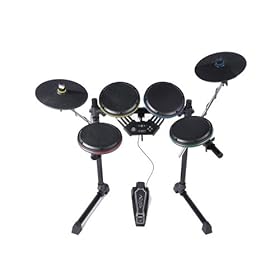
This thing is, by all accounts, the mother of all gaming drum sets. It’s basically a real electronic drum kit that just has a control box that allows it to interface with your system (in my case, Xbox 360). In fact, you have the option to buy a different control box to swap in and allow you to actually play it like electronic drums - outside of the game - so, for all intents and purposes, you’re buying a real instrument.
Setup is tricky, as you’ll read about on the web, but not difficult, just time consuming. Part of the benefit of the kit is its flexible setup: you can position any of the pads in pretty much any position you want to customize the experience to your needs. That’s actually kind of its downside, too, if you’re not an experienced drummer because you spend a lot of the first few hours of play fiddling with drum and cymbal positioning in an effort to get it “just right.” All of it is hand-tightened, though, so it’s easy to pretty quickly get things moved around as you need. I’m trying to get my kit set up as if it were a real kit, which is made that much more difficult because I don’t have any background and most stuff on the web just says “make sure it works for you.” That doesn’t tell me much. That said, there are several YouTube videos from helpful folks that tell you things to consider as you set up real kits that I’ll probably take advantage of. For example, I found a good high-level one explaining cymbal placement.
The pads are quiet - a bit quieter than GHWT, even. They also have a nicer bounce to them and, much as it may or may not matter, a nicer surface texture. The drums and cymbals feel far sturdier than either the Rock Band or GHWTkits (as well they should) and definitely seem to be built to take a pounding. I’m not going to be putting a stick through the tops of these any time soon.
Portability is far lower than the other two kits because this thing is so frickin’ big. The pads are bigger, the cymbals are bigger, and when you get it all configured, you’ll find things are spread out a little more than on the smaller kits. It’s also much heavier (somewhere around 30 - 40 pounds) so you won’t be one-handing this one into the other room like you did with the other kits. You also probably won’t be trucking it to your friend’s house unless you want to spend the time disassembling, reassembling, and reconfiguring the kit. They say it “folds up for storage” and you probably could… if you don’t mind re-setting it up to your liking every time.
The kick pedal on this set is, by far, the sturdiest of the three sets. All metal workings - not just metal on top of plastic or whatever. The spring on the pedal isn’t terribly resistant, though, which (for me) sometimes ends up in double-hits on the kick drum because my foot gets a little out of control. I’m sure it’s just a “human calibration” issue. It doesn’t anchor to the kit frame, but it doesn’t move around, either, because there are these two pointed screws that you can adjust so it anchors the pedal right to the carpet. (If you’re on hardwood floors you can adjust it so the screws won’t scratch your floor, and there’s rubber on the bottom of the pedal so it will still not slide around.)
With this kit, even in the short time I’ve played with it, I can already tell that when I miss a note, it’s my fault. Every time I miss, I instantly already know what I was doing wrong. In the few hours I played, never once did I feel like it ever dropped a note.
Something I’m quickly finding out: I am going to have to re-learn how to play. I’ve gotten so used to the tight setup of the smaller kits (and the lack of cymbals) that now I’ve got a better kit I’m actually doing worse because I have to adjust my internal timings - how far it is from one pad to another, stop using the yellow pad for the hi hat and use the actual yellow cymbal, stop using the green pad for the crash and actually use the green cymbal, etc. Not a bad thing, but something to get used to.
Summary
- I like, in order of best kit to worst kit: Ion, GHWT, Rock Band.
- If you have the choice (and the $300 to spend), go for the Ion. It is, without a doubt, the superior drumming experience. Especially if you primarily play the drums in the game.
- If you don’t have the choice but can afford to get the whole GHWT band set (again, at the time of this writing, they don’t sell the kit by itself), do that. Even the whole band kit is only $180 or something, which will save you some cash and get you yet another plastic guitar.
- If you’re really going budget, the Rock Band 2 kit sells standalone for $50. It’s not great, but it works.