
Home Server Upgrades
I took the plunge today and decided to do a little upgrading on my Windows Home Server. I was already going to have to add some drives, and found so many people out there who noted that a RAM upgrade was a massive improvement, I decided to do both - add RAM and drives.
The first, and trickiest, upgrade, was the RAM. I got a Corsair DDR2 667MHz 2GB stick from Fry’s. Then, following this guide, I disassembled the server, swapped out the RAM, and put it all back together. (There are a few Home Server RAM upgrade guides out there, but the one I used from Home Server Hacks seemed to be the most detailed and helpful.)
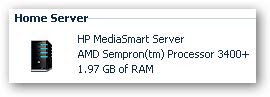
The RAM upgrade was a little fiddly, having to take so much apart to get to the RAM, and I’m not afraid to say I started sweating a little when it booted up and the “health” light on the front of it turned red for several seconds (presumably as it realized there was more RAM and adjusted things). After that, though, I was able to log in and see the upgrade had taken effect:
I also adjusted my pagefile size (there’s a guide for that, too).
The difference? I don’t have many add-ins running (just the standard stuff that came on the server and the KeepVault backup add-in), but even the basic Home Server Console comes up noticeably faster. Before the upgrade, the console took maybe 10 - 15 seconds to come up. Now it takes maybe three seconds. Definitely an upgrade that was well worth doing.
I also bought two 1TB Western Digital Caviar GreenPower drives to put in. Admittedly, the “green” aspect of the drives is nice, but the simple fact is that they were on sale for $155 each at Fry’s (limit one per customer, so I had Jenn buy one) and I didn’t have to take my chances with NewEgg’s shoddy OEM drive packaging… plus, since it’s a retail package, I get the full retail warranty.
Adding a drive to the Home Server is the easiest thing in the world. Power down the server, take one of the empty drive trays out, snap the drive into the tray, put the tray back in its slot and snap the drive in. Done. Power up the server and it sees the drive - all you have to do is, through the Home Server console, tell it if you want it to be added to the main server storage or not.
I added both drives to the main body of server storage since I’m ripping DVDs to it and ended up with a total capacity of 2.73TB (1.91TB free).

The difference in space is due to that awesome “marketing 1KB == 1000 bytes, computer 1KB == 1024 bytes” thing. You only get about 931MB of actual usable space on a 1TB drive.
Regardless, after these upgrades, my Windows Home Server is a tiny box of awesome. Now I’m going to go set up that Dell Studio Hybrid I ordered for our home theater PC.
UPDATE 2/4/09: I’ve added an eSATA port multiplier and two more 1TB drives for a total of 4.55TB in storage. It was an easy upgrade that enables future storage upgrades without using the USB ports up.