Disneyland/Legoland Vacation
For our second anniversary, Jenn and I packed up for a week and headed down to sunny southern California to visit Disneyland and Legoland.
We flew down on October 14th and were hoping to get there in reasonable time, but we had some fairly serious delays due to mechanical troubles on the plane, so we spent most of the day stuck in the airport. Luckily, we planned a “travel day” on either side of the actual vacation, so this didn’t hinder us too badly.
The 15th through 17th we toured through Disneyland and Disney’s California Adventure. It’d been years since either Jenn or I had been to Disneyland and neither of us had been to California Adventure, so it was really fun to see not only the stuff we were familiar with, but the new rides and exhibits.
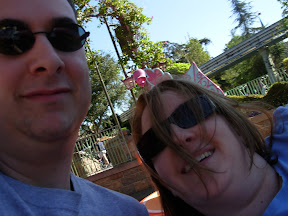
The 15th was primarily Disneyland. We stayed at the Disneyland Hotel, so we took the monorail into the park first thing in the morning and while everyone else was working front-to-back on the park, we worked back-to-front. The first rides we did were the Mad Hatter’s Tea Party and the Alice in Wonderland rides because Alice is, by far, my favorite Disney character. Jenn wasn’t expecting much from the tea cups, but Ireally cranked that thing around and we both left pretty dizzy. (A kid coming on the ride after us literally ran to get our cup because “it was the fastest one out there.” Heh.)
We continued on through Fantasyland and then went through into Tomorrowland to enjoy some classic Star Tours action. After Tomorrowland, we hit Adventureland, stopping in at the Jungle Cruise and Enchanted Tiki Room, then through to see the Pirates of the Caribbean (which has been updated to match the movie). We came back to ride the new Indiana Jones ride and, while it was fun, we ended up having to ride twice because the first time we rode, it broke down and we got stuck on it (with the lights on and everything) for quite some time. We finished off that first day watching the characters parade down Main Street, USA.

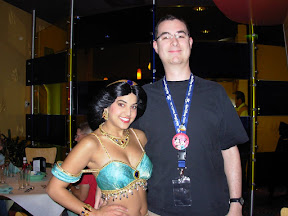
The 16th we started the morning with a character breakfast at Goofy’s Kitchen, an all-you-can-eat buffet of just about anything you’d ever want to eat. Princess Jasmine and Princess Aurora were there, as was Goofy, Chip and Dale, Pluto, and Baloo. It sounds silly, but it was actually very fun (and great food).
Following breakfast, we spent the day going through California Adventure. California Adventure is less about the Disney cartoons and more about celebrating the nostalgia of California history. While there’s definitely some kid stuff here, I think it’s more adult-oriented because smaller kids aren’t going to know what stuff like the California Zephyr are.
We saw the Muppet Vision 3D movie, rode the taxi through Monstropolis (from Monsters, Inc.), checked out the various Bug’s Life things, and then wandered around on the boardwalk enjoying the rides and the food. We finished off the day in California Adventure watching the Pixar Play parade - a parade of Pixar movie characters.
Since California Adventure closed relatively early, we sauntered back over to Disneyland to see the Haunted Mansion (now done up in Nightmare Before Christmas style, and particularly so since it’s Halloween time) and ride Splash Mountain. Let me tell you - you can get into Splash Mountain easier later at night, but you really get soaked down and it doesn’t dry up too well. Jenn and I walked the park soaking for quite some time after that.
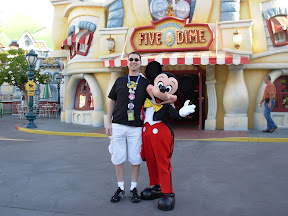
The 17th was dedicated to picking up rides and areas of the park we didn’t get a chance to see. We started the day in Disneyland and enjoyed the morning ceremonies in Toontown, getting our pictures with Mickey and seeing other characters as well. After that we went back to Fantasyland and took a cruise around Storybook land, seeing miniaturized versions of significant storybook locations. We started getting tired after that so we headed over to Tom Sawyer’s island and, after that, rode the Mark Twain riverboat.
The day was pretty hot, and we were worn out, so we took a breather back at the hotel for a bit before returrning to the park and riding the California Screamin’ roller coaster in California Adventure, then finishing out the day watching an amazing fireworks display over Cinderella’s Castle in Disneyland.
The 18th we checked out early from the hotel and drove the hour or so south from Anaheim into Carlsbad to see Legoland. Our hotel, the Sheraton Carlsbad Resort and Spa, had a private entrance to the park, so we headed right into the park without having to wait in line at the beginning.
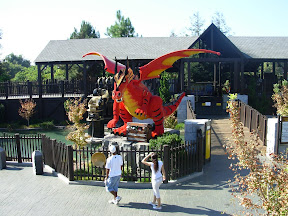
The phrase of the day was, “Hey, check out that <insert noun> made out of Lego!” If you’ve ever seen a Lego show, or been to a Lego store and seen some impressive models, Legoland puts all of that to shame. Particularly the “Miniland” section, with full city replicas of well-known US locations. It’s spectacular from a Lego perspective… but the rides and attractions are definitely geared toward the younger (3 - 13) set. There’s really only one ride there for the older crowd: The “Knight’s Challenge,” which is basically a robot arm from a car manufacturing plant that someone welded some chairs to. You get in the chair and it thrashes the living crap out of you. An awesome ride, to be sure, and proves that it doesn’t need to have rails to be a good ride.
Another thing we noticed: Lego really hasn’t taken advantage of all of the merchandising opportunities it could. There were only like five or six different shirt styles that said anything about “Legoland” on them; everything else, including the Lego sets, were all things you could get at a Lego store or on their web site. There were a lot of things I wanted that simply didn’t exist. Here’s hoping they figure that one out.
Since we finished out Legoland in a day, we took the 19th to sleep in and rest our feet. Grabbed some breakfast at IHOP, drove down to see the Hotel del Coronado, and basically were lazy, which was nice.
The 20th saw us checking out from the hotel in Carlsbad and driving back to LAX to return the rental car and grab our plane home. Again, due to misjudged timings and such, we spent most of the day traveling.
All in all, it was a great trip. I really do love Disneyland and it was great to be a kid again. It’s sort of like going to Las Vegas (which I also love) but with less sin. I will definitely have to find another opportunity to go, or maybe hit Disney World in Florida so i can see Epcot. I probably will wait a while before going back to Legoland, to see if they do some renovations to address the older set or add some new models. Good times.