Status on Xbox Live DRM and Dashboard Problems
I realized that I hadn’t posted any update on my Xbox Live DRM problems or the dashboard update issues I was having, so here you go.
The DRM Issue:
Back in October, I got my third console replacement and ran into the same stupid DRM trouble I had the previous two times: Content I purchased could not be played unless I was logged into Xbox Live - not just signed in, but signed in and online. This isn’t as much a problem for a one-gamertag household, but when you have a two-or-more-gamertag household (like my wife and I have), it means that a game I bought for both of us to play is suddenly only accessible to my wife when I’m signed in, whether I’m actually physically there or not. Lame.
Unfortunately, they changed the process on how to fix this such that it was different from my previous two go-rounds. I was told it’d take two to four weeks to get a resolution.
The issue was still not resolved at the beginning of this month (January 2008), which is well beyond the two-to-four-weeks promised timeframe. Calling Xbox Live Support did no good - they must have a stock answer for situations like this: “I’m sorry, but I don’t have any additional information. Your case has been escalated to Microsoft and they will get back to you.” No one else you can contact, nothing else you can do.
I ended up contacting Major Nelson about it. I gave him the full details - times, dates, names, and status - and within three days a guy from Xbox Escalations called me. I provided some additional information that they were apparently missing (but never asked for) and got a direct phone number for him so if anything goes wrong, I can call him and he’ll personally take care of it.
Of course, the new “deadline” for getting a fix is Feburary 7, so I don’t actually have an answer yet, but I’m more hopeful than before.
An interesting side note: talking to the guy at Escalations, it turns out the Microsoft folk don’t get special treatment on this. He has a cubicle-mate that is in the same wait-it-out boat that I’m in. Apparently, Microsoft didn’t realize that changing the process for re-authorizing a console would be this much challenge. I, personally, am not surprised at all.
 The
Dashboard Update
The
Dashboard Update
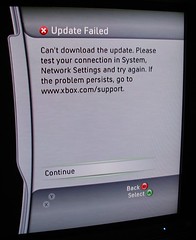
In December, while waiting for my DRM problems to be solved, I found that I was suddenly unable to get onto Xbox Live at all because I couldn’t take the latest dashboard update. I blamed it on the DRM problem and, after calling support on this one, too, it turned out that I wasn’t the only one having issues.
That said, after doing some maintenance and troubleshooting, the problem ended up being with my hard drive.
When you get a console replacement, you send in your console, but you keep your hard drive, faceplate, and other peripherals. As such, my hard drive had been attached to four different consoles and had taken dashboard updates just fine for the first three, but when it came time to take an update for the fourth console, it’d had enough. Something got corrupted on the drive and it needed to be formatted.
I spent, literally, over ten hours on the phone with support for this one. I had to do all sorts of ridiculous troubleshooting (they’d tell me it was a problem with my network, which I damn well knew it wasn’t, then they’d say it was something else, like stabbing in the dark), I got lied to several times (they’d tell me I’d get calls back and I never did, they’d tell me they “escalated my call” and they never did), and generally got put through the wringer.
Once I got past the hoop jumping - which I firmly believe was caused in no small part by language barriers - I finally got to a supervisor who said he’d replace my hard drive. But the process for replacing a hard drive is that you send in your old hard drive, they send you a new one… and you lose all of your data. Unacceptable. After explaining how I’d been lied to and how much time I’d spent on the phone already, I convinced them to send me a hard drive without my having to send them mine in return - compensation for putting up with this crap.
Of course, after a week of not hearing anything, I had to call up and do the same convincing all over again with a different supervisor because the supervisor who promised me a new hard drive was in the Xbox Live division of support but the people who can actually grant that sort of thing are in the Hardware division of support.
Anyway, after fighting that out, I got a new hard drive in the mail, formatted it (it still had someone else’s content on it!), was able to take the dashboard update, and moved as much of my stuff as I could over to the new drive.
Oh, did I mention this was in late December when they were having Xbox Live problems? Think about that in context with my DRM issues - I can’t get to my content (which includes moving it) without signing in, but I can’t sign in because Xbox Live is having problems…
It was painful. After a lot of hassle, I got all but my Zuma and Bejeweled 2 save games moved over (for some reason you can’t move or copy them, so I lost all of my progress in both of those games) and formatted my old drive. Now I have one drive for game content and one drive for video content or archiving stuff.
Now, if only they’d remedy this DRM issue…