Hamilton Halloween
Due to the COVID-19 pandemic, we didn’t end up doing our usual hand-out-candy-and-count-kids thing. However, we did make costumes. How could we not? Something had to stay normal.
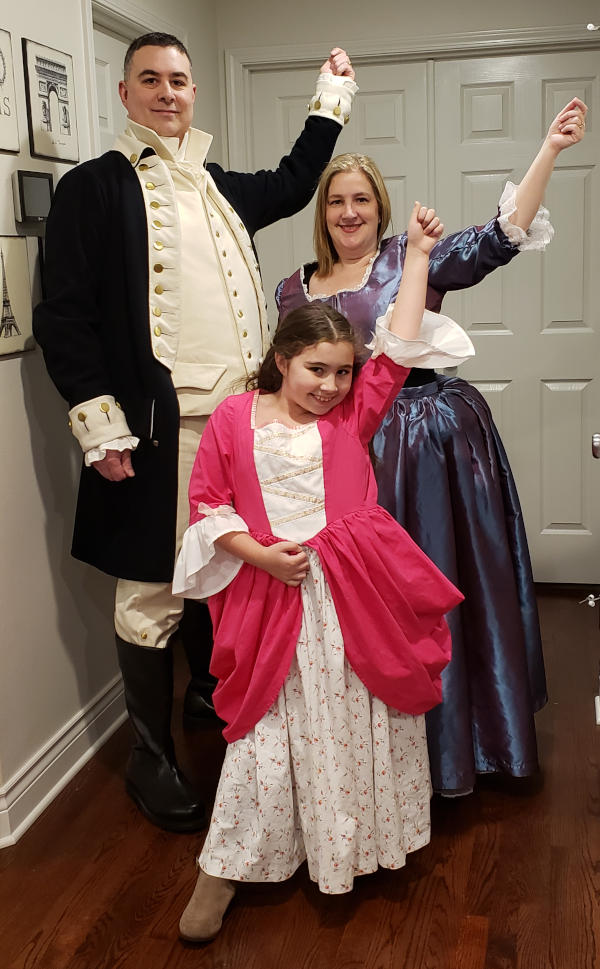
My daughter Phoenix, who is now nine, is obsessed with Hamilton. I think she listens to it at least once daily. Given that, she insisted that we do Hamilton costumes. I was to be A. Ham, Jenn as Eliza, and Phoenix as their daughter also named Eliza.
I was able to put Phoe’s costume together in two or three days. We used a pretty standard McCall’s pattern with decent instructions and not much complexity.
For mine… I had to do some pretty custom work. I started with these patterns:
- Coat - Smoke and Fire SF201 18th century regimental coat
- Shirt - JP Ryan 1700’s colonial shirt
- Vest - Laughing Moon men’s regency and romantic era vest
- Pants - McCall’s M4745 Civil War coat and trousers
It took me a couple of months to get things right. They didn’t really have 6’2” fat guys in the Revolutionary War so there was a lot of adjustment, especially to the coat, to get things to fit. I made muslin versions of everything probably twice, maybe three times for the coat to get the fit right.
I had a really challenging time figuring out how the shoulders on the coat went together. The instructions on the pattern are fairly vague and not what I’m used to with more commercial patterns. This tutorial article makes a similar coat and helped a lot in figuring out how things worked. It’s worth checking out.
Modifications I had to make:
- Coat:
- Arms lengthened.
- Arm holes bigger around.
- Arms bigger around.
- Body lengthened.
- Lapels trimmed to be square at the top (more like the stage production).
- Didn’t put on the shoulder buttons or the back ribbons the pattern called for.
- Set buttonholes 2” long and 2.5” apart (roughly - they don’t specify this in the pattern but other research turned these measurements up and it worked out).
- Six buttonholes around each cuff instead of three (more like the stage production).
- Pants:
- Cut off slightly below the knee.
- Taper to fit tightly around the bottom below the knee.
- Add a “flap” on each side at the bottom of each leg to look like there are buttons holding it together.
- Finish the bottom of each leg with a band.
- Vest: Lengthen the body.
I didn’t have to modify the shirt. The shirt is already intentionally big and baggy because that’s how shirts were back then, so there was a lot of play.
The pants were more like… I didn’t have a decent pattern that actually looked like Revolutionary War pants so I took some decent costume pants and just modded them up. They didn’t have button fly pants back then and my pants have that, but I also wasn’t interested in drop-front pants or whatever other pants I’d have ended up with. I do need to get around in these things.
I didn’t keep a cost tally this time and it’s probably good I didn’t. There are well over 50 buttons on this thing and buttons are not cheap. I bought good wool for the whole thing at like $25/yard (average) and there are a good six-to-eight yards in here. I went through a whole bolt of 60” muslin betwee my costume and the rest of our costumes. I can’t possibly have come out under $300.
But they turned out great!
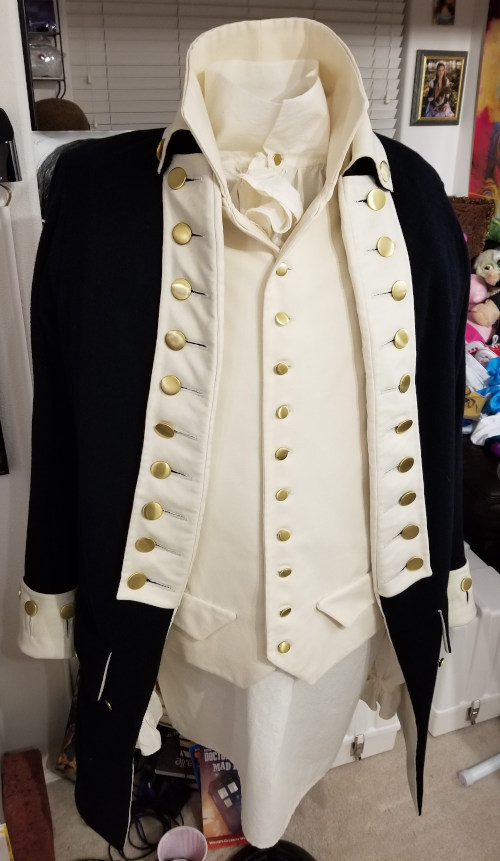
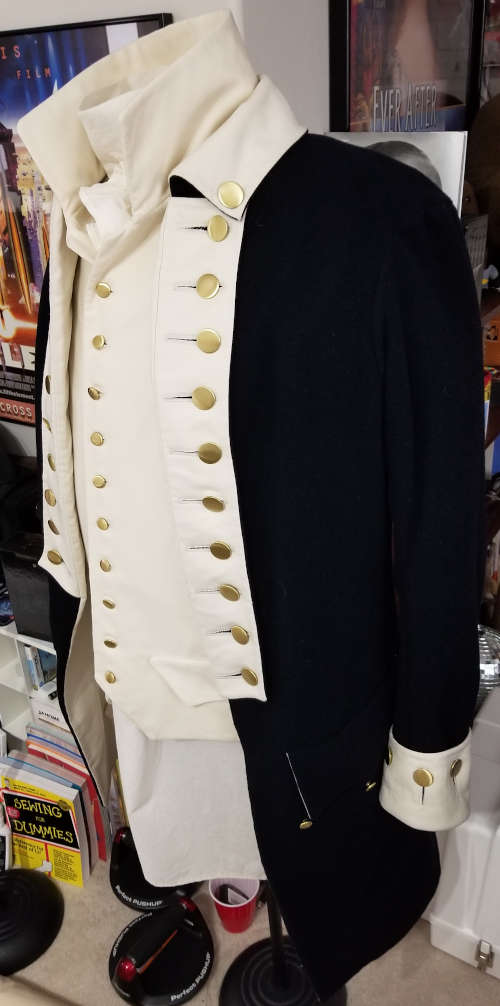
Here’s my costume close up on a dress form:
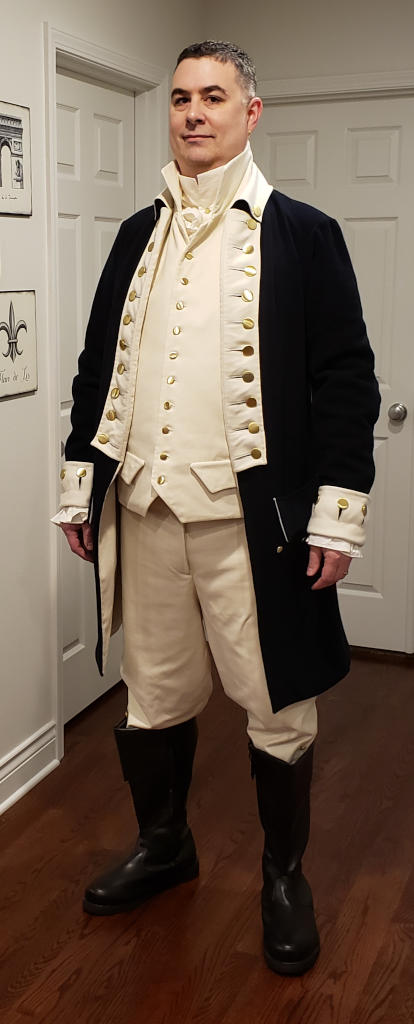
And the costume in action:
Here’s the whole family! I think they turned out nicely.
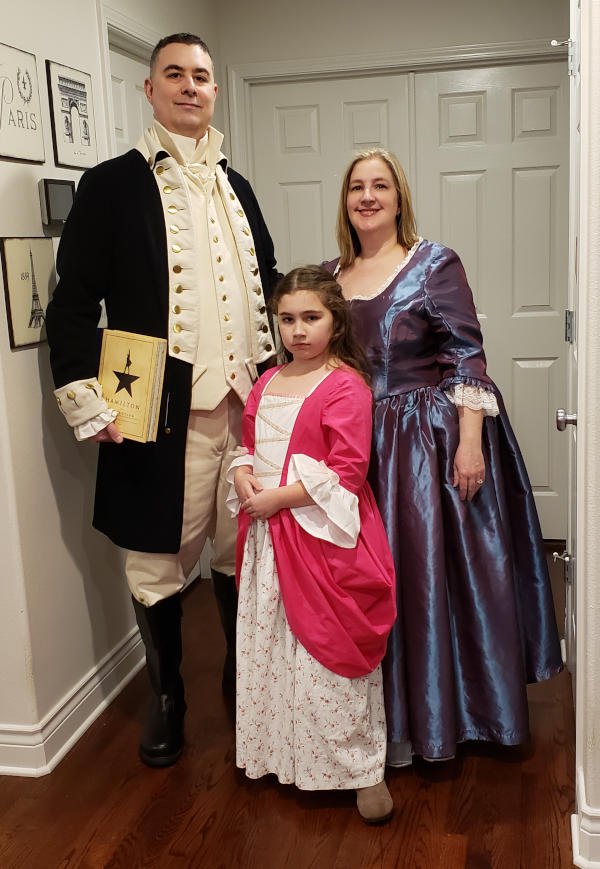
Work! Work!