I’ve been having some trouble with my Windows Home Server involving some
potentially misbehaving hardware when put under load. This really only
manifests itself when I run PerfectDisk to defrag
it,
but I’m gathering it’s really a hardware or driver issue and not
PerfectDisk’s fault. When you defrag the server will entirely hang up
until you reboot it. Occasionally I’ll get file conflicts or lose my
backup database. Not great.
Anyway, I have a lot of data stored on that Windows Home Server -
terabytes of DVD rips (from discs I own) - and with the problems I’m
having, it doesn’t give me a lot of confidence, especially since I can’t
turn on file duplication given the size of the data. I don’t have enough
storage to handle keeping double copies of it. Not only that, but I’ve
noticed that, on occasion, just streaming the DVD rips (not HD, just
regular old DVD rips) can get a little slow. Again, not great.
Since the WHS works for music and backups and other videos reasonably
well, I figured I’d find a solution to move the DVD rips to and get them
off the WHS. Once they’re off, I can remove some of [what I believe to
be] the problem drives and figure out what the real issue is. Either
way, finding a different NAS solution for my DVDs is a must so if a hard
drive goes out, I don’t have to re-rip a bunch of stuff.
I did some research on NAS solutions that support RAID of various levels
and I ended up on the Synology DS1010+. Why?
- Speed. Looking at various reviews for NAS devices, Synology
devices seem to always be rated high for speed, and usually higher
than others.
- Expandability. Most consumer-grade NAS solutions come with a max
of four drive bays. After that, you can expand with eSATA (like I
did for my Windows Home
Server)
and be at the mercy of the compatibility of the NAS with the port
replicator or whatever. The DS1010+ actually has a specific port
replicator that Synology sells that ensures the fast performance you
expect and gives you a total of 10 drives’ worth of storage.
- Data protection. As mentioned earlier, I can’t duplicate my DVD
rips because I don’t have the room to store everything twice. In a
RAID 5 array, though, I have protection for my data if a drive dies
but I don’t have to have double the storage capacity to do it.
- Flexibility. This thing appears to be a reasonable answer to WHS
as far as features are concerned. You can have it run FTP, iTunes
library sharing, DLNA media serving, client PC backup, security
camera monitoring/recording, or a ton of other stuff. (I’m not going
to do that all immediately; right now, just storing the DVD images
is enough.)
- Confidence. This is more a psychological thing, but… after
having so many troubles with this WHS and the disks in it, I’ve lost
some of the confidence I once had with it. I’ve started compulsively
checking the light on the front to see if there’s a “Network Health
Critical” warning. I never know if the thing’s going to hang up or
fail. I need to find something new I can have some confidence in and
put my mind at ease. That’s not a new WHS.
I picked the diskless NAS up at Amazon for
$980.
Next, drives.
Synology has a compatibility
list for the
drives it supports in its various devices. For the DS1010+, drives
basically fall into two categories: “We’ve tested it and it works” and
“It should probably work.” Given my current hardware issues, I wanted
drives that were in the “We’ve tested it and it works” category. I
wanted 2TB drives, I wanted reasonable performance (it doesn’t have to
be an SSD to store DVD rips), and I didn’t want to go broke on it.
I settled on Seagate Barracuda ST32000542AS 2TB 5900RPM drives for
$120 each at
Amazon.
Why?
- Reasonable reviews. I found that unless you get into really
expensive drives, most hard drives have poor reviews. The general
reason it appears is that sometimes folks will get a DOA drive and
instantly go for the one-star rating rather than resolving the issue
and then rating the drive proper. You’ll also get the folks who had
to call support and had a bad time, which factors in some, but
doesn’t really say anything about the drive. Excluding those, it
looks like [assuming you get fully functional drives] they’re pretty
good.
- Reasonable speed. They’re not 7200 RPM drives, but they are
faster than 5400 RPM drives and even appear to compare favorably
with some older 7200 RPM
drives.
- Price. There’s a gap in 2TB drive pricing between some of the
5400 RPM drives and the faster 7200 RPM drives. Like, it jumps from
around $150 drive up to $280 drive without anything in the middle.
Price for supposed performance, I couldn’t really beat $120 each.
I picked up four of those drives, so my total cost was $980 + (4 *
$120) = $1460. That’s not a cheap bit of kit up front, but if I
consider the storage and what I’ve already put in, it’s not that bad.
Interesting side note on my Windows Home Server issue: While I was
researching drives, I came across a note in the Synology forums
talking about issues people have seen with WD Green drives - the
drives I have! Even on the Synology compatibility
list
you’ll see that there are only a couple of sub-models that performed
reasonably in testing. I went through my drives on my WHS and it turns
out only about half of them are the decent/peformant models; the
others are models that have tested as poor and degrading performance
over time. That very well could explain my problems. After I get my
DS1010+ set up with all the DVDs moved over, I’ll be removing the
problem disks to see if that fixes things.
UPDATE 6/16/2010: Removing the problem drives appears to have
stabilized my
WHS.
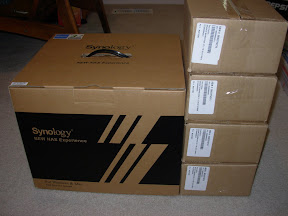
I got the NAS and the disks today. Love that Amazon Prime. Here are the
boxes and then the unbox:
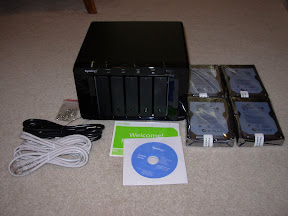
I installed all of the drives following the instructions in the quick
start guide (very easy), plugged it into my UPS, connected it to the
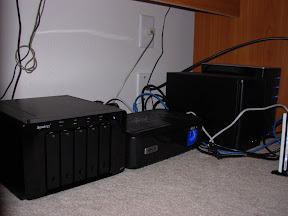
network, and turned it on. Here’s the NAS under my desk. From left to
right: Synology DS1010+, Tripp-Lite UPS, Rosewill RSV-S5 eSATA port
replicator, and HP EX475 Windows Home Server. You’ll notice that the
DS1010+ is about the same size as the Home Server, just laid out
horizontally instead of vertically.
Once it was plugged in, it was time to install the firmware. To do that,
you use a program called “Synology Assistant” that installs on your
client computer. The Assistant detects your NAS and allows you to
install the “DSM” or “DiskStation Manager” software/firmware over the
network. It’s a lot like installing Windows Home Server in that respect
- the NAS is headless and you install and configure it all over the net.
I downloaded the latest Synology Assistant and DSM patch from the
Synology download
site rather than
using the ones that came on the included CD. I wanted to be sure I had
the latest version of everything rather than installing an old version
and upgrading later. I unzipped it all in a folder and away I went.
I installed the Synology Assistant and there was a second of panic when
I couldn’t find the icon for it in my Start menu - the reason is that I
was running as a non-admin user and the installer only installs a
shortcut for the user it installs under. In this case, the local machine
Administrator was the credential set I entered when the installer asked
for better credentials so that’s who got the icon. Rather than log out
and log back in, I just ran the DSAssistant.exe program found in the
install folder.
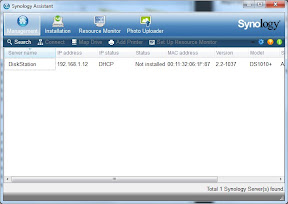
After unblocking it from Windows Firewall, I got this screen showing the
detection of the DS1010+ and that no firmware was installed.
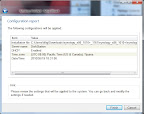
I double clicked on the server and it took me to an installation screen.
First, I selected the DSM “patch” I had downloaded.
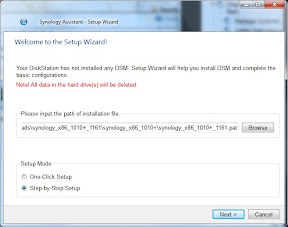
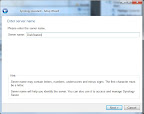
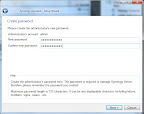
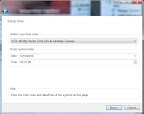
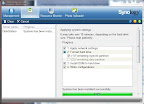
Then I walked through setting up the name of the NAS, the admin
password, network settings, etc. Note that I used the “Step By Step”
setup rather than the “One-Click.” Seeing as how I left everything as
defaults except the administrator password, the one-click setup probably
would have been fine.

After finishing the install, I went back to the Synology Assistant
management screen (using the icons at the top) and it sort of freaked me
out because the server status appeared hung on “Starting services.” I
did a manual refresh (using the not-so-intuitive “Search” button) and
the status updated to “Ready.”
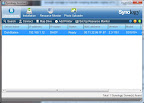
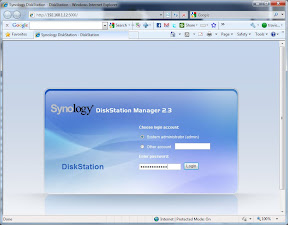
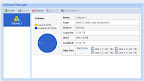
I selected the DiskStation and clicked the “Connect” button which
brought up the web interface to log in. I could also have just gone to
port 5000 on the DiskStation by manually entering a URL in a browser.
After logging in, I went into the “Management” section and then into
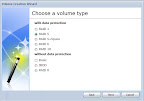
Storage -> Volume Manager, which automatically started the Volume
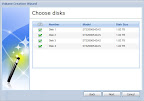
Creation Wizard. I used the web-based wizard to create a RAID 5 volume
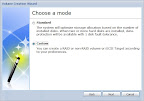
out of the installed disks. Two notes on this:
- I used the “Custom Volume” option rather than the “Standard Volume”
option because I wasn’t clear on what would happen in a multi-disk
volume in “Standard” mode. I wanted RAID 5, so I specified.
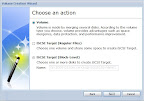
- I selected the option to check/remap all the bad sectors. There
shouldn’t be any on the new drives, but I also wanted to do some
burn-in/health checking and this appeared to be the way to do it.
That said, it takes FOREVER. Click the “go” button and leave it
overnight. Note that you don’t have to stay connected to the
web-based manager - you can close it up and let it run. To give you
an idea, I let it run for about a half hour and got to 7% before
deciding to let it be.
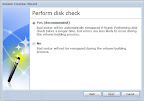
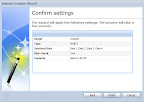
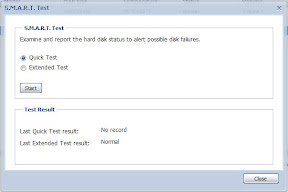
Once the volume was created, I wanted to make sure the disks were
running in good order, so I ran an extended SMART
Test on them. Granted, it’s
not like a major stress test or anything, but it’s good to check what
the drive’s reported condition is.
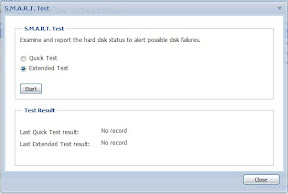
I let that run because the extended test takes 255 minutes. In the end,
the results came back “Normal.”
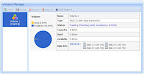
And here’s the detailed info for one of the drives:
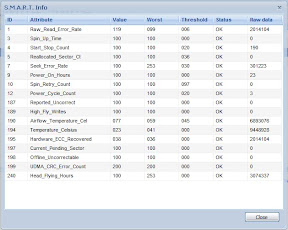
So, the disks seem to be working.
I noticed is that these particular drives are not always quiet.
When they “woke up” the next morning (I left volume creation running
overnight and logged in the next day), there was a noticeable amount
of disk noise coming from them. I’d read a little about this in some
of the user reviews. During the SMART Test, and even during the volume
creation, they were reasonably quiet, but I/O can sometimes be a
little noisy. They appear to test out, though, so if it’s just noise,
I can handle that. It’s under my desk in the office, not sitting next
to my TV while I’m watching a movie.
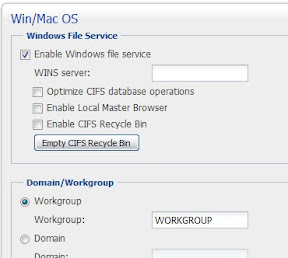
With the disks tested and ready for content, I had to make sure Windows
file sharing was enabled. I also ensured the NAS was in the “WORKGROUP”
workgroup so we can use our Windows credentials. (All of my machines are
in the default “WORKGROUP” workgroup so this was fine.) Easy enough
through the web console:
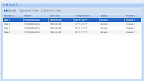
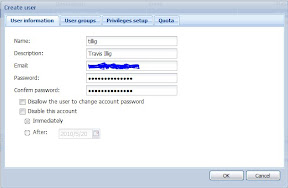
I then went in and created a user account on the system for all the
users in the workgroup. I made sure to give them the same usernames and
passwords as on the local machines so the Windows pass-through auth will
work.
Finally, I had to create a shared folder for my DVDs to be stored in -
also easy:
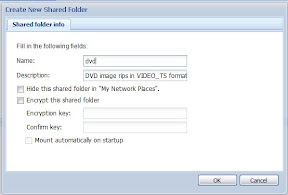
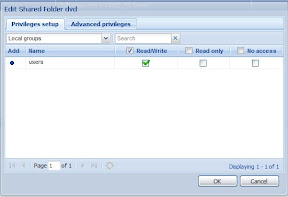
Note that I left the permissions read/write for the default system
group. Since all the users are in that group, it means everyone has
read/write permissions, which, for my purposes, is perfect.
From a general user standpoint, the web-based management utility is
really nice and clean. If you didn’t know better, you’d think you were
using a native application. It’s a little more confusing than the WHS
console, but then, it also does a lot more right out of the box.
Last thing to do is a little [really rough] speed test. I decided to
copy a DVD rip I had made to both the home server and the new NAS. I
used the speed estimation thing that shows up in the Windows copy dialog
box, so it’s not, like “a benchmark” so much as a general indicator.
Also, my laptop only has a 100 Mbit card on it so even though I’m
connected to a gigabit switch, it’s negotiating down. (I tried a
wireless N connection where I was getting 135 Mbit but various network
interference and such, which is horrible in my house, ended up making it
slower than a wired 100 Mbit connection.)
Write speed: Copying to Windows Home Server went between 10.5MB/sec
and 10.8MB/sec, usually sticking around 10.7MB/sec. Copying to the
Synology DS1010+ went between 10.6MB/sec and 11.1MB/sec, usually
sticking at 11.0MB/sec. Not the major performance increase I thought
it would be, but it’s a little faster.
Read speed: Copying from the Windows Home Server went between
10.9MB/sec and 11.2MB/sec. Copying from the Synology DS1010+ stuck
pretty consistently between 11.1MB/sec and 11.3MB/sec. Again, not the
major performance increase I thought it would be, but, again, a little
faster.
Considering that I’m actually getting some level of data protection and
a slight boost in speed, I can’t really complain. With my WHS setup, if
a disk goes, I’m re-ripping. With the NAS, I’ve got a little RAID 5
overhead but I’m protected if a disk goes.
Also, again, it’s 100Mbit connection, so ostensibly with an actual
gigabit connection I could get 10x the speed. I’d be curious to see the
results with that. Maybe I’ll have to get a different adapter or try a
different computer.
This sort of helps me in diagnosing some of the issues I’ve been seeing
with Windows Media Center and DVD file sharing. I wonder now if maybe my
media center PC is potentially a little underpowered to be driving a
1080p display. Maybe. I digress.
All in all, with the benefits listed earlier, I think this is a good
move. I think the peace of mind alone will probably make up for the
cost. Maybe that’s just me.
Anyway, I’m going to get my DVDs moved over to this and decommission
some of the problem drives on my WHS and see how that goes.
UPDATE 5/6/2011: I had an opportunity to talk about my experience
with the DS1010+ on the Hanselminutes podcast with Scott
Hanselman.
