
Automatically Connect to OpenVPN on Synology with Android
In November of last year I set up a PPTP VPN on my Synology NAS so I could do more secure browsing on public wifi. Since then, I’ve updated my setup to use OpenVPN and made the connection a lot easier.
I based the steps to get my connection working on this forum post but I didn’t do quite the extra work with the certificates.
Assuming you’ve got the VPN package installed and ready to go on your Synology NAS (which I walk through in the previous article), the next steps to get OpenVPN going are:
- Open the VPN Server application in the Diskstation Manager.
- Enable the OpenVPN protocol by checking the box. Leave everything else as default.
- At the bottom of the OpenVPN panel, click “Export Configuration.” This will give you the profile you’ll need for your devices to connect to the VPN.
- In the Control Panel, go to the “Security” tab. On the “certificate” panel, click “Export Certificate.” Save that somewhere and call it
ca.crt. This is a little different than what I was expecting - I had hoped the certificates that come in the OpenVPN zip file (when you export that configuration) would just work, but it turns out I needed to get this particular certificate. YMMV on this. - Just like with the PPTP VPN, make sure the firewall has a rule to allow port 1194 (the OpenVPN port) through. You also need to create a port forwarding rule for port 1194 with your router. You can see how to do this in my other article.
You should have OpenVPN up and running. That part, at least for me, was the easiest part. The harder part was getting my Android phone connected to it and trying to automate that.
First things first, let’s get connected.
Install the OpenVPN Connect app for Android. There are several OpenVPN apps out there; I use this one and the rest of my article will assume you do, too. The app is free, so there’s no risk if you don’t like it.
Open the zip file of exported OpenVPN configuration you got from the Synology and pull out the openvpn.ovpn file. Pop that open in a text editor and make sure that…
- The
remoteline at the top points to your public DNS entry for your Synology, likeyourdiskstation.synology.meor whatever you set up. - The
caline hasca.crtin it.
Here’s what it should generally look like. I’ve left the comments in that are there by default.
dev tun
tls-client

remote yourdiskstation.synology.me 1194

# The "float" tells OpenVPN to accept authenticated packets from any address,
# not only the address which was specified in the --remote option.
# This is useful when you are connecting to a peer which holds a dynamic address
# such as a dial-in user or DHCP client.
# (Please refer to the manual of OpenVPN for more information.)

#float

# If redirect-gateway is enabled, the client will redirect it's
# default network gateway through the VPN.
# It means the VPN connection will firstly connect to the VPN Server
# and then to the internet.
# (Please refer to the manual of OpenVPN for more information.)

redirect-gateway

# dhcp-option DNS: To set primary domain name server address.
# Repeat this option to set secondary DNS server addresses.

#dhcp-option DNS DNS_IP_ADDRESS

pull

# If you want to connect by Server's IPv6 address, you should use
# "proto udp6" in UDP mode or "proto tcp6-client" in TCP mode
proto udp

script-security 2

ca ca.crt

comp-lzo

reneg-sec 0

auth-user-pass
Put the ca.crt certificate you exported and the openvpn.ovpn file on your Android device. Make sure it’s somewhere you can find later.
Open the OpenVPN Connect app and select “Import Profile.” Select the openvpn.ovpn file you pushed over. Magic should happen and you will see your VPN show up in the app.
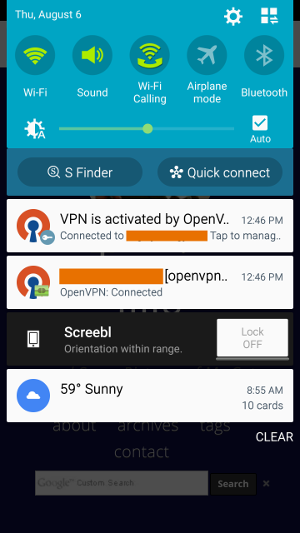
Now’s a good time to test the connection to your VPN. Enter your username and password into the OpenVPN Connect app, check the Save button to save your credentials, and click the “Connect” button. It should find your VPN and connect. When you connect you may see a little “warning” icon saying network communication could be monitored by a third-party - that’s Android seeing your Synology’s certificate. You should also see OpenVPN Connect telling you you’re connected.
It’s important to save your credentials in OpenVPN Connect or the automation of connecting to the VPN later will fail.
If you’re not able to connect, it could be a number of different things. Troubleshooting this is the biggest pain of the whole thing. Feel good if things worked the first time; I struggled figuring out all the certificates and such. Things to check:
- Did you enter your username/password correctly using an account defined on the Synology?
- Does the account you used have permissions to the VPN? (By default it should, but you may be trying to use a limited access account, so check that.)
- Did the router port forwarding get set up?
- Did the firewall rule get set up?
- Is your dynamic DNS entry working?
- Is the
ca.crtin the same folder on your Android device as theopenvpn.ovpnfile? - If that
ca.crtisn’t working, did you try the one that came in the zip file with the OpenVPN configuration you exported? (The one in that zip didn’t work for me, but it might work for you.) - Consider trying the instructions in this forum post to embed the certificate info right in the
openvpn.ovpnfile.
From here on out, I assume you can connect to your VPN.
Now we want to make it so you connect automatically to the VPN when you’re on a wifi network that isn’t your own. I even VPN in when I’m on a “secure” network like at a hotel where you need a password because, well, there are a lot of people on there with you and do you trust them all? I didn’t think so.
Install the Tasker app for Android. This one will cost you $3 but it’s $3 well spent. Tasker helps you automate things on your Android phone and you don’t even need root access.
I found the instructions for setting up Tasker with OpenVPN Connect over on the OpenVPN forums via a reddit thread. I’ll put them here for completeness, but total credit to the folks who originally figured this out.
UPDATE 2/19/2018: OpenVPN Connect 3.0 has a different set of intents used for Tasker automation. I’ll update the instructions for Tasker below to show both ways, but pick the right one for your Android app version.
The way Tasker works is this: You create “tasks” to run on your phone, like “show an alert” or “send an email to Mom.” You then set up “contexts” so Tasker knows when to run your tasks. A “context” is like “when I’m at this location” or “when I receive an SMS text message” - it’s a condition that Tasker can recognize to raise an event and say, “run a task now!” Finally, you can tie multiple “contexts” together with “tasks” in a profile - “when I’m at this location AND I receive an SMS text message THEN send an email to Mom.”
We’re going to set up a task to connect to the VPN when you’re on a network not your own and then disconnect from the VPN when you leave the network.
You need to know the name of your OpenVPN Connect profile - the text that shows at the top of OpenVPN Connect when you’re logging in. For this example, let’s say it’s yourdiskstation.synology.me [openvpn]
- Create a new task in Tasker. (You want to create the task first because it’s easier than doing it in the middle of creating a profile.)
- Call the task
Connect To Home VPN. - Use
System -> Send Intentas the action. - OpenVPN Connect 1.2.7: Fill in the
Send Intentfields like this (it is case-sensitive, so be exact; also, these are all just one line, so if you see line wraps, ignore that):- Action:
android.intent.action.VIEW - Category:
None - Mime Type:
- Data:
- Extra:
net.openvpn.openvpn.AUTOSTART_PROFILE_NAME: yourdiskstation.synology.me [openvpn] - Extra:
- Extra:
- Package:
net.openvpn.openvpn - Class:
net.openvpn.openvpn.OpenVPNClient - Target:
Activity
- Action:
- OpenVPN Connect 3.0.0: Fill in the
Send Intentfields like this (it is case-sensitive, so be exact; also, these are all just one line, so if you see line wraps, ignore that):- Action:
net.openvpn.openvpn.CONNECT - Category:
None - Mime Type:
- Data:
- Extra:
net.openvpn.openvpn.AUTOSTART_PROFILE_NAME:PC yourdiskstation.synology.me [openvpn] - Extra:
net.openvpn.openvpn.AUTOCONNECT:true - Extra:
net.openvpn.openvpn.APP_SECTION:PC - Package:
net.openvpn.openvpn - Class:
net.openvpn.unified.MainActivity - Target:
Activity
- Action:
- Call the task
- Create a second new task in Tasker.
- Call the task
Disconnect From Home VPN. - Use
System -> Send Intentas the action. - OpenVPN Connect 1.2.7: Fill in the
Send Intentfields like this (it is case-sensitive, so be exact; also, these are all just one line, so if you see line wraps, ignore that):- Action:
android.intent.action.VIEW - Category:
None - Mime Type:
- Data:
- Extra:
- Extra:
- Extra:
- Package:
net.openvpn.openvpn - Class:
net.openvpn.openvpn.OpenVPNDisconnect - Target:
Activity
- Action:
- OpenVPN Connect 3.0.0: Fill in the
Send Intentfields like this (it is case-sensitive, so be exact; also, these are all just one line, so if you see line wraps, ignore that):- Action:
net.openvpn.openvpn.DISCONNECT - Category:
None - Mime Type:
- Data:
- Extra:
net.openvpn.openvpn.STOP:true - Extra:
- Extra:
- Package:
net.openvpn.openvpn - Class:
net.openvpn.unified.MainActivity - Target:
Activity
- Action:
- Call the task
- Create a new profile in Tasker and add a context.
- Use
State -> Net -> Wifi Connectedas the context. - In the
SSIDfield put the SSID of your home/trusted network. If you have more than one, separate with slashes likenetwork1/network2. - Check the
Invertbox. You want the context to run when you’re not connected to these networks.
- Use
- When asked for a task to associate with the profile, select
Connect To Home VPN. - On the home screen of Tasker you should see the name of the profile you created and, just under that, a “context” showing something like
Not Wifi Connected network1/network2. - Long-press on the context and it’ll pop up a menu allowing you to add another context.
- Use
State -> Net -> Wifi Connectedas the context. - Leave all the other fields blank and do not check the
Invertbox.
- Use
- On the home screen of Tasker you should now see the profile has two contexts - one for
Not Wifi Connected network1/network2and one forWifi Connected *,*,*. This profile will match when you’re on a wifi network that isn’t in your “whitelist” of trusted networks. Next to the contexts you should see a little green arrow pointing toConnect To Home VPN- this means when you’re on a wifi network not in your “whitelist” the VPN connection will run. - Long-press on the
Connect To Home VPNtask next to those contexts. You’ll be allowed to add an “Exit Task.” Do that. - Select the
Disconnect From Home VPNtask you created as the exit task. Now when you disconnect from the untrusted wifi network, you’ll also disconnect from the VPN.
You can test the Tasker tasks out by going to the “Tasks” page in Tasker and running each individually. Running the Connect To Home VPN task should quickly run OpenVPN Connect, log you in, and be done. Disconnect From Home VPN should log you out.
If you’re unable to get the Connect To Home VPN task working, things to check:
- Did you save your credentials in the OpenVPN Connect app?
- Do you have a typo in any of the task fields?
- Did you copy your OpenVPN Connnect profile name correctly?
You should now have an Android device that automatically connects to your Synology-hosted OpenVPN whenever you’re on someone else’s network.
The cool thing about OpenVPN that I didn’t see with PPTP is that I don’t have to set up a proxy with it. I got some comments on my previous article where some folks were lucky enough to not need to set up a proxy. I somehow needed it with PPTP but don’t need it anymore with OpenVPN. Nice.
NOTE: I can’t offer you individual support on this. Much as I’d like to be able to help everyone, I just don’t have time. I ask questions and follow forum threads like everyone else. If you run into trouble, Synology has a great forum where you can ask questions so I’d suggest checking that out. The above worked for me. I really hope it works for you. But it’s not fall-down easy and sometimes weird differences in network setup can make or break you.