
Making My Tenth Doctor Suit
For Halloween this year I went as the Tenth Doctor from Doctor Who (originally played by David Tennant).

I make my costume every year (well, pretty much every year) and I enjoy sewing so it was fun to take this on. However, I don’t normally post “behind-the-scenes” stuff and there are folks who don’t really realize what goes into making a costume so I figured this year I’d do it. Oh, and if you want to see the pictures in a larger format, I have an annotated photo album on Google Photos.
Before doing anything else, I did some research. The Making My Tennant Suit blog was the best resource I found for info on the suit, the fabrics, and so forth. It has a really good fabric comparison showing different fabrics and sources that match/approximate the fabric from the suit. I also gathered a few pictures from the web to help me pick the right pieces.
I was due for some new glasses, so I picked some out that both look good on me (IMHO) and are close to the ones seen in the show.

I went to Jo-Ann Fabrics and searched for a pattern. None were exact, but I found that Vogue pattern 8890 was pretty close. I figured I could take “View A” jacket from the pattern, change it from a two-button jacket to four buttons, and add a custom breast pocket. The “View D” pants could be done unmodified.
The pattern was actually pretty ambitious. Given that it wasn’t a “costume pattern,” it was fully lined with all the extra stuff you’d find if you bought a suit - nicely finished pockets, extra give/pleats in the lining for movement… Definitely the most complex thing I’ve taken on to date.
The fabric I picked was ordered online from Hancock Fabrics. It’s item #3859071 “Brown and Teal Pinstripe Suiting.” I got it on sale half-off so I bought something like eight yards so I wouldn’t run out if I made a mistake or had to lengthen the pants/sleeves on the suit.
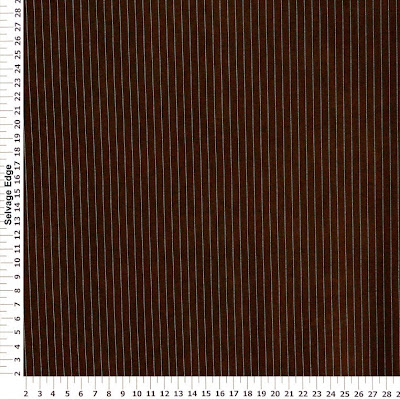
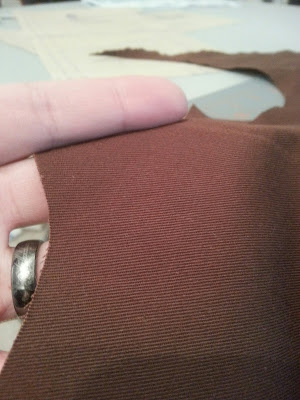
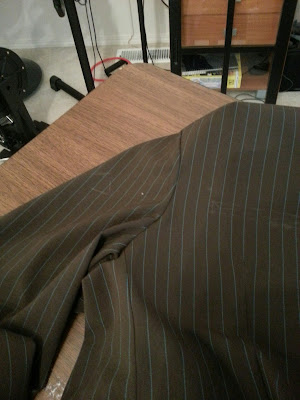
This particular fabric was a little challenging to work with because it was somewhat light and stretchy. When you work with cotton or wool, it’s not really stretchy so you can cut and pin it without worrying about it moving on you or changing shape. With this, I had to be really careful about pinning it, making sure I wasn’t stretching it while it was getting cut, and so on.
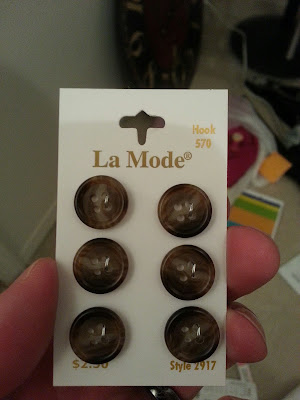
The buttons I used were some pretty standard tortoise shell ones off the shelf.
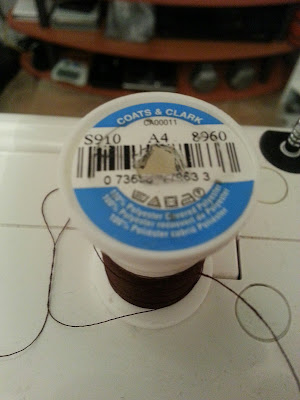
Thread was Coats & Clark #8960. It was the perfect brown to match the fabric so hems and seams were nice and hidden. I think I went through three of these spools of thread.
The pocket insides, waistband lining, and other strong internals was all done with some off-the-shelf brown cotton twill. You don’t really see this from the outside, but it is a nice shade to offset the suiting. Not that I had a lot of choice; there was only one color of brown twill available when I went shopping and I wasn’t feeling too picky.
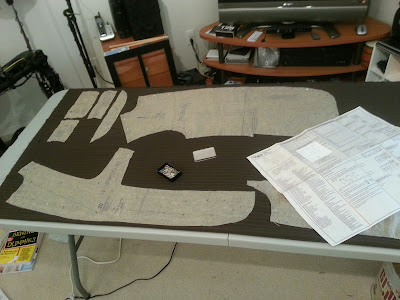
After I got all the materials together, I got down to work. I ironed the pattern (yes, ironed the pattern - on low heat, to make it easy to cut out and all flat), cut it out, and pinned the pattern to the fabric. There were something like 15 pieces to the pants and 30 pieces to the jacket.
I did the pants first (though I didn’t get any pictures of the making of the pants). Normally I’ve found Vogue patterns run a little small, so I took my measurements and did the pants the next size up. This pattern seemed to run pretty true to size, so I had to take the pants in when they were done. I haven’t yet figured out how to fit a pattern on myself before it’s finished.
Doing the pants first helped me figure out that I needed to make the jacket true to size.
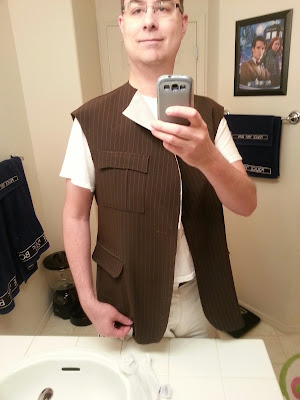
The first part of the jacket to be done is the main body outside. In this picture you can see I’ve replaced the breast pocket from the pattern with one of my own design so it matches the Tenth Doctor. I did that without a pattern, sort of taking an average measurement on width/height of pockets on other garments and fudging something together. This custom pocket is about 5.5” wide and 6” tall.
After the body of the jacket was done, it was time to sew the arms in. Putting arms in a jacket is always a real pain because the fabric at the top part of the arm is larger than the arm hole on the jacket body. They do that so you can move around, but it means you have to be really careful about putting the arm in and evenly distributing the extra fabric or you’ll get gathers along the seam where the fabric folds over onto itself. This is a particular problem with stretchy fabric, which likes to move around a lot. I had to rip out and redo a couple of areas to remove the gathering, but I got the arms in.
Here’s the jacket with both sleeves sewn in but the lining not yet put in. The white stuff you see on the collar is interfacing - a sort of mesh-like fabric that you attach to make other fabric less flexible. You have interfacing in collars and cuffs, for example. I used “fusible interfacing” which is basically iron-on to attach. This pattern called for “hair canvas” interfacing, which is really expensive and much harder to work with. If I was making this as a suit and not as a costume, I probably would have tried to work with the hair canvas.

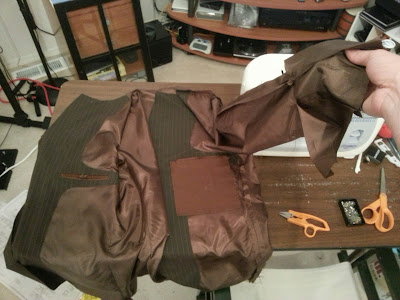
With the outside done, it was time to do the lining. The first bit of lining was the inside front - the part with the inside pocket. Here’s the inside of the right front. You can see in the image a diagonal line where the collar is intended to fold over. You can also see a small, thin rectangle where the inside pocket will eventually go.

Here’s the inside right front after getting the inside pocket in. You can see a small loop hanging down off the top of the pocket that will be used to button the pocket closed. The pattern called for 2” of ribbon (I used bias tape) for the loop, but that turned out to be too small to fold around the button that will be later attached below the pocket. If I were to do it again, I’d use 3” or 3.5” of ribbon. You can always move the button down a bit, but I had to sew my button right on the pocket welt (the twill “lip” lining the pocket).

Here’s what the lining looks like fully assembled - both inside front pieces, the back, and the sleeves. If you’ve never lined a coat before, it’s sort of like making a second copy of the coat, just inside-out. Then you take the lining, put it in the jacket, and sew along the edges. Basically.
In the picture on the left you see the inside pocket as you’ll view it when wearing the jacket; on the right is the other side - that brown square is the other inside pocket.
Once you put the lining in, you have to attach it. The back was able to be machine-sewn in, but the sleeves required hand sewing. Here you see I have the sleeve lining pinned in place so I can hand sew it in.
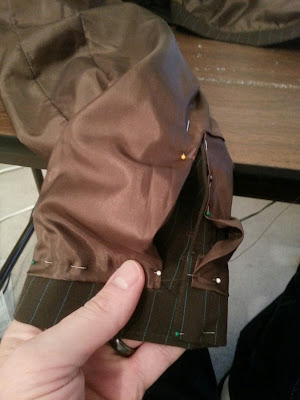
Here’s the same sleeve lining after the hand sewing. I also have the sleeve buttons attached, so this sleeve is done.

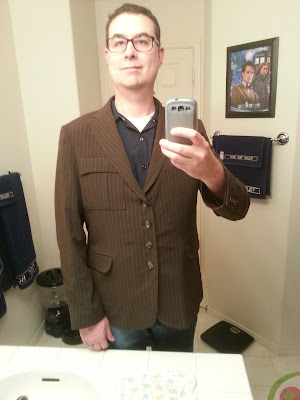
Once the lining is in, the last thing to happen is the front buttons. Here’s the jacket entirely finished. You can see in the photo the white marks around the button holes on the front where I was sketching out the button locations.

I did a little cleanup on the markings and here’s how it turned out.
And, once the whole costume was on, here’s how it looked. I think it turned out pretty well.
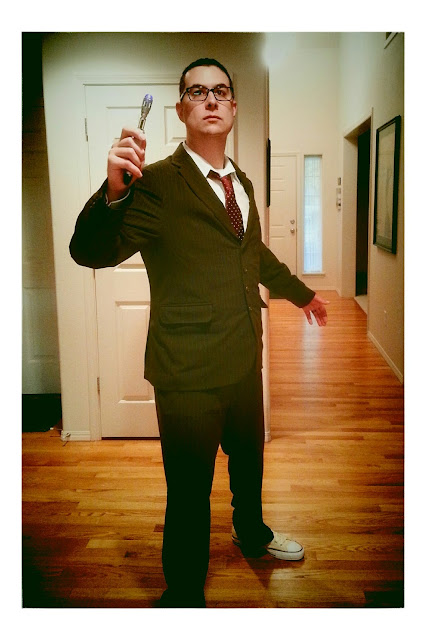
For those interested: The shoes are unbleached white Converse Chuck Taylors. The shirt is one I already had; any old white dress shirt will do. The sonic screwdriver is the toy version that’s been out for a while. The tie is a maroon polka dot tie by Chevalier.
I don’t know how much time it took exactly, but I know that I watch TV/Netflix while I’m working and I made it through three seasons of Kyle XY, the Jekyll miniseries, a couple of movies, and half a season of The Blacklist… and I wasn’t watching something the whole time. So… it took a while.
As far as cost, that’s another thing I didn’t really keep track of, but roughly (guessing on a few of these)…
- Shoes: $45
- Tie: $15
- Pinstripe Suiting: $50
- Lining: $10
- Interfacing: $10
- Felt (for the collar): $5
- Twill: $10
- Thread, buttons, zipper, notions: $30
So… uh… $175? Give or take. It’s not cheap. Even if you take out the cost for the shoes and tie, which I can wear elsewhere, you’re still looking at over $100. Plus the time.
This definitely increases my admiration and respect for folks who do this on a convention circuit.