
Creating Playlists in Asset UPnP
I use Asset UPnP on my Windows Home Server to get my music streaming to my Xbox 360 and PS3. It’s pretty sweet, it’s free, and it’s easy to set up. The only thing missing from it is the various playlists I have in iTunes - Asset UPnP indexes your music, but it doesn’t go through iTunes or Windows Media Player, so your playlists don’t come along.
I did some searching and found a forum post that addresses how to get iTunes playlists into Asset UPnP, but I figured I’d expand on it a bit and give a better walkthrough.
Two important notes before we start:
- I was only able to get playlists to work using Asset UPnP version 3, which is currently in beta but should be released imminently. If you are trying this in version 2 or earlier, I can’t guarantee it works.
- As of version 3, playlists are a paid feature in Asset UPnP. If you want to do this, you need to register your copy of Asset for, at the time of this article, $26. I’ve definitely gotten my $26 worth of use out of it, so it was a no-brainer for me.
Now…
Asset UPnP understands playlistsin the .M3U format. In its simplest form, that means each playlist is a text file where the path to the songs are each on one line.
Given that, there are basically two things you have to do:
- Get your playlists in .M3U format.
- Put them in a place where Asset UPnP can index them.
So let’s do the first thing - get the playlists in .M3U format.
In Windows Media Player playlists are saved as .WPL files. You’ll find them in your “My Music” folder. To export the playlist as .M3U…
- Select the playlist in Windows Media Player.
- Double-click that playlist so it starts playing. You need it to be the “Now Playing” list.
- Select File -> Save Now Playing list as…
- Select a location to save the playlist. If you happen to save the .M3U playlist in the same folder as the original, Windows Media Player will end up showing you two copies of the same playlist - the original .WPL list and the .M3U list. You should save it somewhere you can find later but not right in your “My Music” folder or anywhere WMP indexes.
- In the “Save As Type” dropdown, select “M3U Playlist.”
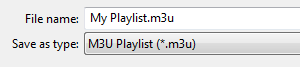
- Click OK to save the playlist.
Now, here’s the pain in the rear part of dealing with it in Windows Media Player: When WMP saves the playlist, all of the file paths in the playlist are relative to the playlist. If you look in there, you’ll see a lot of stuff like “..\Aerosmith\Dude Looks Like a Lady.mp3” style paths. Unfortunately, the paths need to be absolute paths and point to the music on your Windows Home Server (or at least be relative to the Asset installation). On Windows Home Server, Asset UPnP indexes the music share at D:\shares\Music by default, so if that’s where your music is, it means “..\Aerosmith\Dude Looks Like a Lady.mp3” needs to be “D:\shares\Music\Aerosmith\Dude Looks Like a Lady.mp3” - absolute paths that Asset UPnP can understand.
The lame thing is there’s no way to magically do that. You’re going to need to open up a text editor like Notepad2 and do some search-and-replace action. I’ll not get into how to search-and-replace here; if you can’t figure that out, setting up playlists is definitely beyond your capacity.
Also, if you’re exporting from Windows Media Player and you have music files that have names with international characters in them, you may need to manually rename the file to have the extension “.m3u8” rather than just “.m3u” - this tells Asset to look for international characters.
In iTunes playlists are saved internally to the database, so you have to use a script to get them out. Fortunately, there’s a great iTunes Export program that will do the heavy lifting.
- Go to the iTunes Export web site and install the application. It’s very easy and takes just a few minutes.
- Close iTunes if you have it open. The exporter uses the XML version of the library and you want to make sure both that iTunes isn’t locking that file and that the very latest has been written to disk so the exporter gets the right data.
- Run the iTunes exporter.
-
Select the iTunes library XML file location.
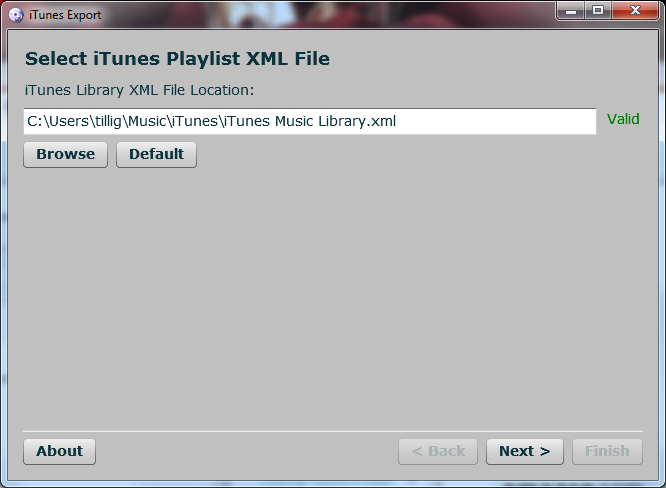
- Wait while the application loads the iTunes library and discovers your playlists.
-
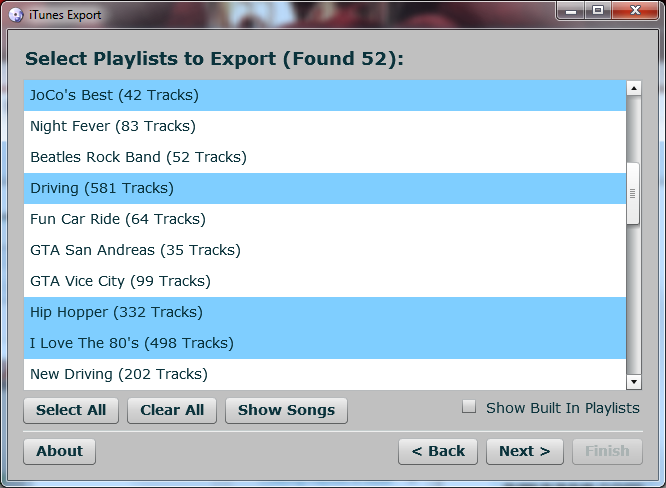
Select the playlists that you want to export, then click “Next.” (The selected playlists will turn blue.)
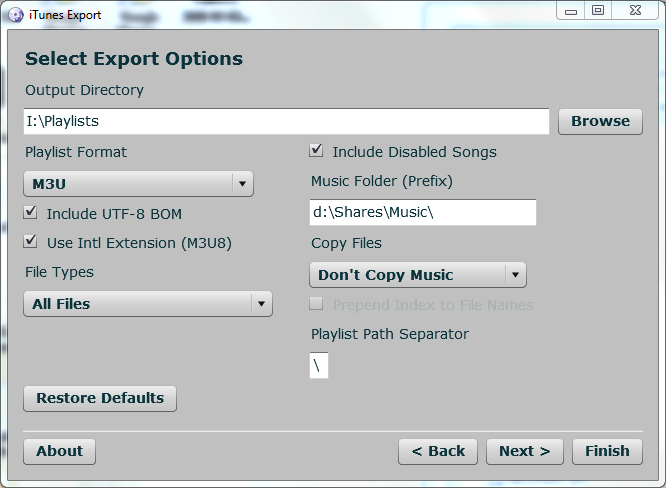
- Select your various export options and click “Next.” Make sure
you…
- Choose “M3U” as the playlist format.
- Check the “Include UTF-8 BOM” and “Use Intl Extension (M3U8)” boxes. This allows you to have artist or track names that have international characters in them.
- For “File Types” choose “All Files” since Asset UPnP will be transcoding things so they can all be understood by the target client.
- In the “Music Folder (Prefix)” field, put the file path (relative to the Asset UPnP installation) where the music is stored on your server (this will most likely be d:\Shares\Music\) and don’t forget the trailing slash. Setting that “Music Folder (Prefix)” field makes it so you don’t have to do any search-and-replace later.
- Make a note of the “Output Directory” setting because this is
where the playlists will end up.
- The exporter will finish and you can close it.
- Find the playlists you just exported and…
- Name the .M3U8 files the way you want to see them listed in Asset. For example, a playlist in iTunes called “I Love The 80’s” will be exported as “I Love The 80_s.m3u” by the exporter and Asset will show that as “I Love The 80_s” - the filename, not the original title.
- Open each file and remove the comment line from the top (the line that starts with a “#”).
By now you should have:
- Your playlists in .M3U (.M3U8) format.
- File paths in the playlists so Asset UPnP can find the music.
Now you need toput your playlists somewhere Asset can find them. I put mine in the Public share on my Windows Home Server under a folder called “Playlists” (e.g., \\myhomeserver\Public\Playlists). (Note: If you are using iTunes Export, you can make your life a lot easier by mapping a network drive to this location so you can export your playlists directly to the shared destination.)
Finally,you need to configure Asset UPnP to find the playlists you just put on the server.
- Open the Windows Home Server console and click “Settings.”
- Select “Asset UPnP.”
- In the Asset UPnP settings dialog, click the “Edit” button next to “Advanced Settings” - this will open the advanced settings dialog for Asset.
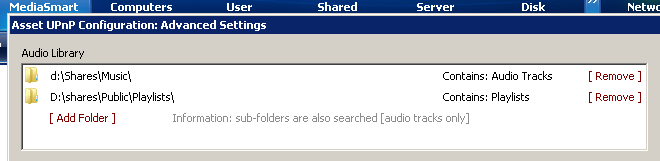
- In the top right corner you’ll see a box marked “Audio Library.” In it you should see the folder “D:\Shares\Music” listed - this is how Asset knows which folders to scan for contents. You should also see that “D:\Shares\Music” is listed as “Contains: Audio Tracks.”
- In the “Audio Library” box, click the “[Add Folder]” link.
- Browse to and select the location you placed your playlists. In my case, I placed them in the Public share in a “Playlists” folder, so I selected to “D:\Shares\Public\Playlists”
- By default, Asset sets the folder to contain music. Click the
“Contains: Audio Tracks” text next to the playlist folder and a
dropdown will appear. Select “Contains: Playlists” from there.
- Click OK. Asset will tell you it needs to restart. That’s OK. It will then rescan the library and your playlists will be included.
You now should be able to access your playlists through a suitable DLNA client. As it turns out, Xbox 360 does not support playlists, but Playstation 3 does. That’s not a problem with Asset UPnP; it’s a problem with the client.