
Context Menu Icons with DXCore
A long time ago I posted a little sample showing how to get context menus working with your DXCore plugin. As part of a new plugin I’m working on, I wanted to get an icon to show up in the context menu next to my entry in the menu, something like the icon you see for the Refactor! menu.
It’s possible, but it’s not really documented, so here’s what you do.
First, make sure you’re working with a DevExpress.CodeRush.Menus.IMenuButton. This is the type of thing you can click on and have something happen, as opposed to a DevExpress.CodeRush.Menus.IMenuPopup which is what allows you to have nested menus (like if you hover over it another context menu will fly out). The IMenuButton can have an icon, the IMenuPopup can’t.
Now make two 32 x 32 bitmap images. The first is going to be the icon you want to display. The second is the transparency mask so the menu knows what to show and what to hide. The color image will look like this:
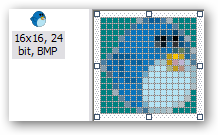
Note that in your transparency mask, black pixels are the parts of the image I want shown and the white pixels are parts you want to be transparent.
To make it easy, I used the Visual Studio icon editor. You could do this in your favorite paint program or whatever, but I’m lazy. This has the added benefit of embedding the icons as resources (which, again, you could do after creating these in a paint program).
Once you have your icon and your transparency mask, you can create your button, set the style to show both the icon and the caption (text), then call SetFace()` to set the “Face” property to be the color icon and the “Mask” to be the transparency mask. It’ll look something like this:
MenuBar editorContextMenu = DevExpress.CodeRush.VSCore.Manager.Menus.Bars[VsCommonBar.EditorContext];
var contextMenuButton = editorContextMenu.AddButton();
contextMenuButton.Style = ButtonStyle.IconAndCaption;
contextMenuButton.SetFace(
  Properties.Resources.ContextButtonIcon.ToBitmap(),     Properties.Resources.ContextButtonIconMask.ToBitmap());
  // ...and set other properties, too:
  // * Caption
  // * Enabled
  // * Click event handler
  // * etc.
Note the “ToBitmap()” call I have there - that’s because the “Face” and “Mask” properties take bitmaps but I used the icon editor so the format needs to be transformed into a bitmap from an icon. If you embed a bitmap directly, you won’t have to do anything additional.
Once you have that, your button should have the proper icon with transparency in the context menu. Done!
UPDATE 3/4/2010: Rather than setting “Face” and “Mask” separately, use the “SetFace” method. Setting the properties manually works in VS2008 but fails in VS2010; using “SetFace” works in both.