
HOWTO: Change Roomba Into Raceba
I was joking a while ago talking about Nuttba - a hypothetical modified version of Roomba that could automatically drive around and smack you in the happy sack. It did, however, give me an idea.
See, I had an issue with my Roomba where some wheel sensor or another got blocked. Roomba support sent me a whole new one, but the old one was unusable. Time to play with the Roomba remains.
I decided that if it wasn’t going to vacuum any more, it needed to be speedy. Maybe I could take it one step closer to Nuttba? “Raceba” maybe
- race it around the place?
The endgame: make Roomba a remote controlled beast.
I know Roomba already has a remote control, but Roomba’s not meant for speed. There are three possible schools of thought here: Hardware Engineer: Buy some parts to replace/rewire the engines, remove the unnecessary extras, and bolt the whole thing back together better than before. Software Engineer: Buy something that can replace the whole inner workings off-the-shelf with minimal effort because I don’t do that ‘hardware thing.’ Everyone Else: What’s the point?
I’m a software engineer, so my solution is not nearly as elegant as it could be if I knew more hardware stuff, but it only cost me $14 and took a couple of hours, tops.
[Warning - this is a 100% destructive process. Your Roomba will NEVER vacuum again. This unit was dead, so it was fine. But if you do this, it’s at your own risk and cost. Just be warned.]
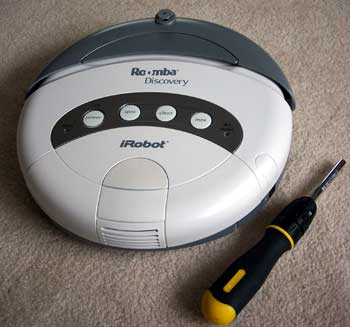
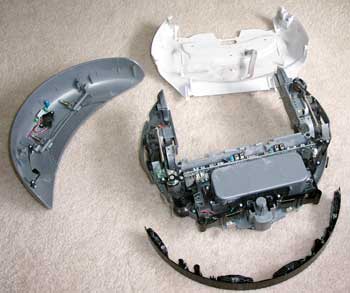
Here it is: How to make Roomba more fun - pictures and step-by-step description of the process. Enjoy. Okay, so here’s the standard Roomba that we know and love.
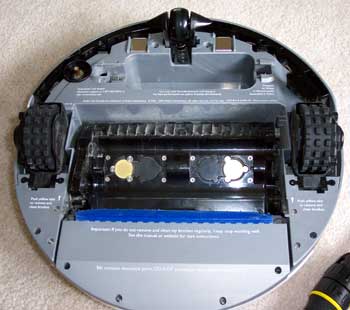
Flip him over. There are a bunch of screw holes that hold the bumper and body on. Look around and find them. Note there are a couple down by the black vacuum motor unit in the center of Roomba - theyr’re a little hard to get to, but you should see them.
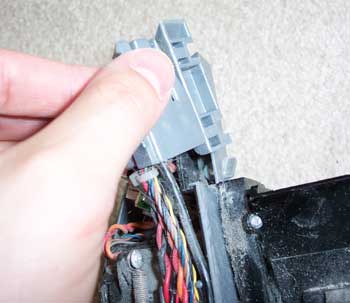
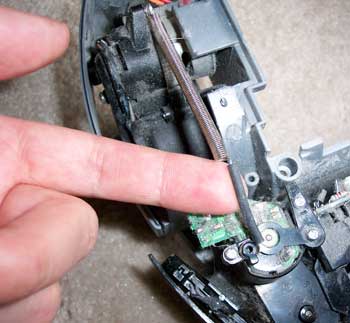
Detach the bumper first to make it easier - the bumper partially holds the main body top on. You’ll need a skinny screwdriver to get into the screws in the bumper, like I have here.
The bumper is connected to the main body with some wires. Not that we need to be all that careful (we’re going to gut Roomba anyway), but disconnecting the wires makes for easier bumper removal.

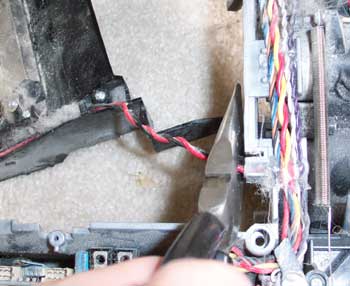
Now you should be able to remove the top (assuming you’ve removed the rest of the screws holding it on. The top is also connected with a bunch of wires. Just go ahead and cut those.
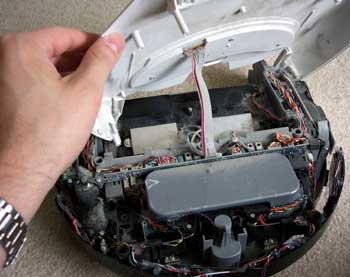
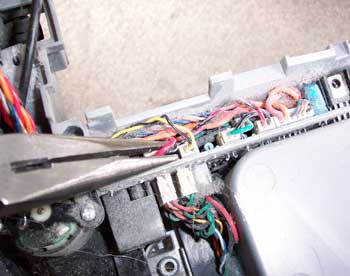
In the back where the dust bin plugs in, the little connectors that hold the dust bin in place also hold down some wires. You can pull them up to release the wires.
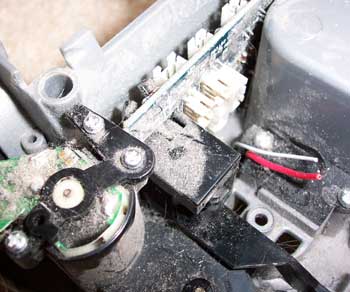
The main board in Roomba has a bunch of wires connected to it, too. Disconnect as many as you can. We’ll cut the rest later.
Get that vacuum motor out of the way. We don’t need that anymore.
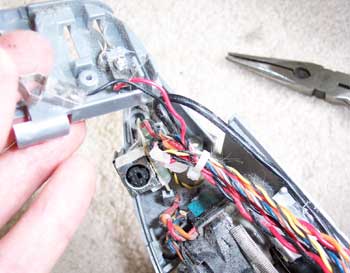
Okay, now, again, back where the dust bin connectors are, you’ll see that one side has some wires screwed to it. Unscrew the wire connections to release the wires, but put the little metal clips back - they stop the dust bin from rattling around too much.
Strip the wires and stuff from the inside of Roomba. When you’ve got the wires stripped, he’ll look like this:
We don’t need the wheels anymore. Disconnect the springs that hold the wheels down, then unscrew the screws that hold the wheels on. Don’t lose the little screws or the plastic bits on the underside that hold the screws in, though - you need those.
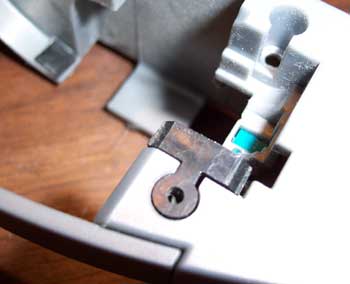
The screw on the outside of each wheel that held the wheel in needs to be replaced. Those screws also hold the sides of Roomba together. Here’s the top view of where the right wheel used to be - you can see that the inside screw isn’t there, but the outside one is.

This is the underside view of that screw - see how the little black plastic bit is what holds the screw in? That’s why you can’t lose those when you remove the wheels.
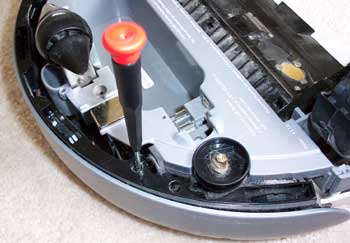
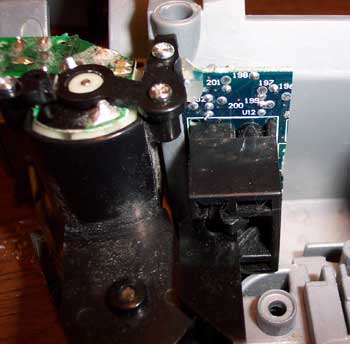
Here’s the trickiest part of the thing. You’ll see on each side of the main board that there are black plastic “boxes” that hold the bumper spring arms in. If you unhook the spring arms, you’ll see they just fly out and would never hold the bumper on.
Disconnect the bumper spring arms from the main board, then remove the main board from the Roomba by unscrewing the little retaining brackets on either side. Use a Dremel tool to cut the two ends off the main board
- just enough to leave the black plastic boxes on each side. You don’t need the middle of the board, just those ends. Hot glue the two ends back into their original positions and replace the retaining brackets. It doesn’t have to be indestructible, just enough to hold the bumper arms in.
As you’ve seen, we’ve removed as much extraneous weight from Roomba as possible. One last thing - on the dust bin, there’s a blue rubber “apron” thing. Pull that off. You don’t need it dragging around. You can later sand down the tabs on the dust bin that held the rubber apron on.

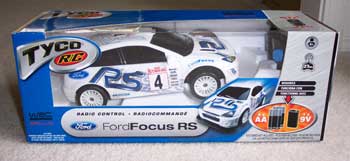
Now, the R/C car I bought was the $14 6V el cheapo from the toy store. Roomba’s only about 12” in diameter, so you can’t have anything much bigger than this or it’ll stick out from underneath. This one was just about right, maybe a little on the small side. But the price was right, and I can always go back and use a better one. It’s going to be sacrificed anyway, so $14 was pretty reasonable.
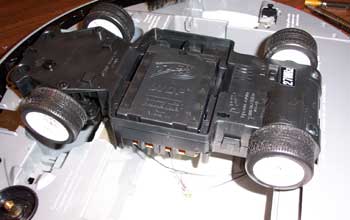
Unpack the car and remove the plastic body because you won’t need it. Be careful when you remove it that you don’t accidentally rip off the antenna wire they have attached to the underside of the body.
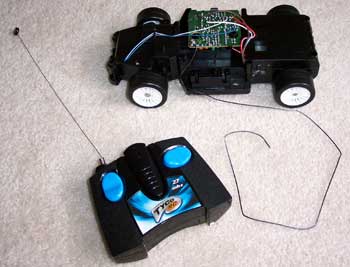
The stripped R/C car, ready to go Roomba:
At this point, you can re-attach Roomba’s top, then the bumper (in that order). Finally, the dust bin.
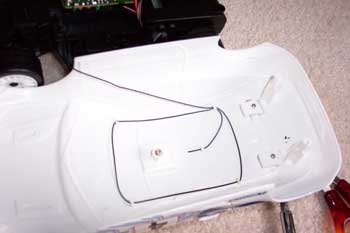
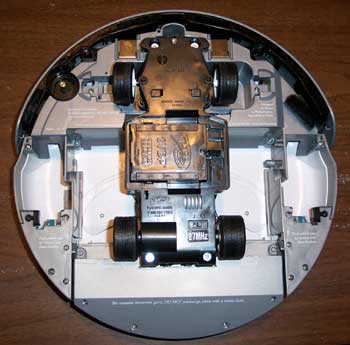
Here’s the other tricky part - you have to cut out notches in the Roomba body so the R/C car can mount to it. We’ll mount it with some screws using the same holes that held the original R/C car body on, but we’ll screw through Roomba’s underside.
I ended up holding the car up to the bottom of Roomba and tracing out some lines, then using a Dremel tool to cut out the parts to help it lay flat. You’ll see I cut out a section near the battery compartment and a small bit from the dust bin. The battery compartment turned out to be perfectly located for the wheels on the car, so I didn’t have to cut out anything to make sure the wheels would move correctly.
Mount the R/C car to Roomba using some screws. The screws I used were some 1.5” wood screws, but it doesn’t really matter as long as they fit in the holes in the R/C car. You’re going to be drilling some holes (or forcing the screws through) in Roomba anyway.
Here’s a different view of the mounted R/C car:
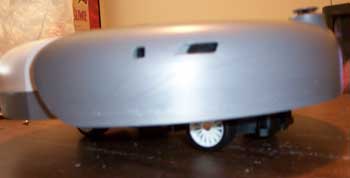
Raceba lives! You’ll see it doesn’t sit too much higher than original Roomba - maybe another inch.
I took this thing to work and we had a blast with it. I think I’m going to put one of those orange kid bike flags on it so I can see where it is over the cube walls.