I’ve been having some trouble with my Windows Home Server involving some potentially misbehaving hardware when put under load. This really only manifests itself when I run PerfectDisk to defrag it, but I’m gathering it’s really a hardware or driver issue and not PerfectDisk’s fault. When you defrag the server will entirely hang up until you reboot it. Occasionally I’ll get file conflicts or lose my backup database. Not great.

Anyway, I have a lot of data stored on that Windows Home Server - terabytes of DVD rips (from discs I own) - and with the problems I’m having, it doesn’t give me a lot of confidence, especially since I can’t turn on file duplication given the size of the data. I don’t have enough storage to handle keeping double copies of it. Not only that, but I’ve noticed that, on occasion, just streaming the DVD rips (not HD, just regular old DVD rips) can get a little slow. Again, not great.

Since the WHS works for music and backups and other videos reasonably well, I figured I’d find a solution to move the DVD rips to and get them off the WHS. Once they’re off, I can remove some of [what I believe to be] the problem drives and figure out what the real issue is. Either way, finding a different NAS solution for my DVDs is a must so if a hard drive goes out, I don’t have to re-rip a bunch of stuff.

I did some research on NAS solutions that support RAID of various levels and I ended up on the Synology DS1010+. Why?

  • Speed. Looking at various reviews for NAS devices, Synology devices seem to always be rated high for speed, and usually higher than others.
  • Expandability. Most consumer-grade NAS solutions come with a max of four drive bays. After that, you can expand with eSATA (like I did for my Windows Home Server) and be at the mercy of the compatibility of the NAS with the port replicator or whatever. The DS1010+ actually has a specific port replicator that Synology sells that ensures the fast performance you expect and gives you a total of 10 drives’ worth of storage.
  • Data protection. As mentioned earlier, I can’t duplicate my DVD rips because I don’t have the room to store everything twice. In a RAID 5 array, though, I have protection for my data if a drive dies but I don’t have to have double the storage capacity to do it.
  • Flexibility. This thing appears to be a reasonable answer to WHS as far as features are concerned. You can have it run FTP, iTunes library sharing, DLNA media serving, client PC backup, security camera monitoring/recording, or a ton of other stuff. (I’m not going to do that all immediately; right now, just storing the DVD images is enough.)
  • Confidence. This is more a psychological thing, but… after having so many troubles with this WHS and the disks in it, I’ve lost some of the confidence I once had with it. I’ve started compulsively checking the light on the front to see if there’s a “Network Health Critical” warning. I never know if the thing’s going to hang up or fail. I need to find something new I can have some confidence in and put my mind at ease. That’s not a new WHS.

I picked the diskless NAS up at Amazon for $980. Next, drives.

Synology has a compatibility list for the drives it supports in its various devices. For the DS1010+, drives basically fall into two categories: “We’ve tested it and it works” and “It should probably work.” Given my current hardware issues, I wanted drives that were in the “We’ve tested it and it works” category. I wanted 2TB drives, I wanted reasonable performance (it doesn’t have to be an SSD to store DVD rips), and I didn’t want to go broke on it.

I settled on Seagate Barracuda ST32000542AS 2TB 5900RPM drives for $120 each at Amazon. Why?

  • Reasonable reviews. I found that unless you get into really expensive drives, most hard drives have poor reviews. The general reason it appears is that sometimes folks will get a DOA drive and instantly go for the one-star rating rather than resolving the issue and then rating the drive proper. You’ll also get the folks who had to call support and had a bad time, which factors in some, but doesn’t really say anything about the drive. Excluding those, it looks like [assuming you get fully functional drives] they’re pretty good.
  • Reasonable speed. They’re not 7200 RPM drives, but they are faster than 5400 RPM drives and even appear to compare favorably with some older 7200 RPM drives.
  • Price. There’s a gap in 2TB drive pricing between some of the 5400 RPM drives and the faster 7200 RPM drives. Like, it jumps from around $150 drive up to $280 drive without anything in the middle. Price for supposed performance, I couldn’t really beat $120 each.

I picked up four of those drives, so my total cost was $980 + (4 * $120) = $1460. That’s not a cheap bit of kit up front, but if I consider the storage and what I’ve already put in, it’s not that bad.

Interesting side note on my Windows Home Server issue: While I was researching drives, I came across a note in the Synology forums talking about issues people have seen with WD Green drives - the drives I have! Even on the Synology compatibility list you’ll see that there are only a couple of sub-models that performed reasonably in testing. I went through my drives on my WHS and it turns out only about half of them are the decent/peformant models; the others are models that have tested as poor and degrading performance over time. That very well could explain my problems. After I get my DS1010+ set up with all the DVDs moved over, I’ll be removing the problem disks to see if that fixes things.

UPDATE 6/16/2010: Removing the problem drives appears to have stabilized my WHS.

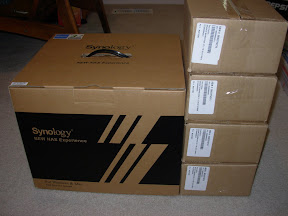
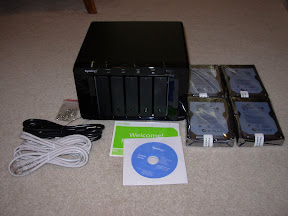
I got the NAS and the disks today. Love that Amazon Prime. Here are the boxes and then the unbox:

Boxed up

Unboxed

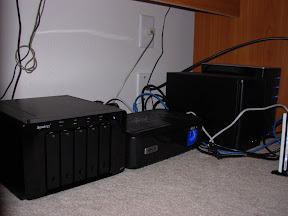
I installed all of the drives following the instructions in the quick start guide (very easy), plugged it into my UPS, connected it to the network, and turned it on. Here’s the NAS under my desk. From left to right: Synology DS1010+, Tripp-Lite UPS, Rosewill RSV-S5 eSATA port replicator, and HP EX475 Windows Home Server. You’ll notice that the DS1010+ is about the same size as the Home Server, just laid out horizontally instead of vertically.

Plugged in under the desk

Once it was plugged in, it was time to install the firmware. To do that, you use a program called “Synology Assistant” that installs on your client computer. The Assistant detects your NAS and allows you to install the “DSM” or “DiskStation Manager” software/firmware over the network. It’s a lot like installing Windows Home Server in that respect

  • the NAS is headless and you install and configure it all over the net.

I downloaded the latest Synology Assistant and DSM patch from the Synology download site rather than using the ones that came on the included CD. I wanted to be sure I had the latest version of everything rather than installing an old version and upgrading later. I unzipped it all in a folder and away I went.

I installed the Synology Assistant and there was a second of panic when I couldn’t find the icon for it in my Start menu - the reason is that I was running as a non-admin user and the installer only installs a shortcut for the user it installs under. In this case, the local machine Administrator was the credential set I entered when the installer asked for better credentials so that’s who got the icon. Rather than log out and log back in, I just ran the DSAssistant.exe program found in the install folder.

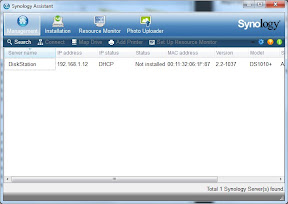
After unblocking it from Windows Firewall, I got this screen showing the detection of the DS1010+ and that no firmware was installed.

Synology Assistant - no firmware installed

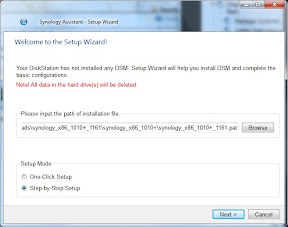
I double clicked on the server and it took me to an installation screen. First, I selected the DSM “patch” I had downloaded.

Synology Assistant - Setup Wizard

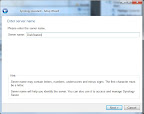
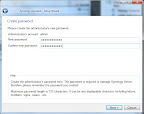
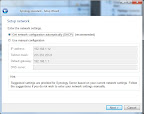
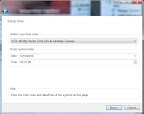
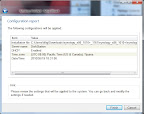
Then I walked through setting up the name of the NAS, the admin password, network settings, etc. Note that I used the “Step By Step” setup rather than the “One-Click.” Seeing as how I left everything as defaults except the administrator password, the one-click setup probably would have been fine.

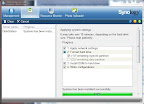
Synology Assistant - Step 1 Synology Assistant - Step 2

Synology Assistant - Step 3 Synology Assistant - Step 4

Synology Assistant - Step 5

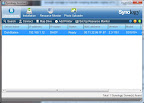
After finishing the install, I went back to the Synology Assistant management screen (using the icons at the top) and it sort of freaked me out because the server status appeared hung on “Starting services.” I did a manual refresh (using the not-so-intuitive “Search” button) and the status updated to “Ready.”

Synology Assistant Synology Assistant

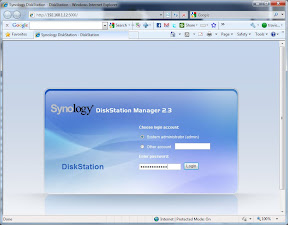
I selected the DiskStation and clicked the “Connect” button which brought up the web interface to log in. I could also have just gone to port 5000 on the DiskStation by manually entering a URL in a browser.

DSM 2.3

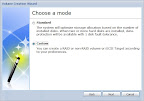
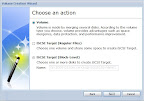
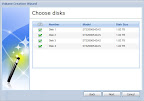
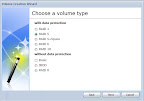
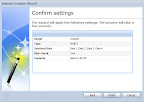
After logging in, I went into the “Management” section and then into Storage -> Volume Manager, which automatically started the Volume Creation Wizard. I used the web-based wizard to create a RAID 5 volume out of the installed disks. Two notes on this:

  1. I used the “Custom Volume” option rather than the “Standard Volume” option because I wasn’t clear on what would happen in a multi-disk volume in “Standard” mode. I wanted RAID 5, so I specified.
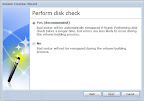
  2. I selected the option to check/remap all the bad sectors. There shouldn’t be any on the new drives, but I also wanted to do some burn-in/health checking and this appeared to be the way to do it. That said, it takes FOREVER. Click the “go” button and leave it overnight. Note that you don’t have to stay connected to the web-based manager - you can close it up and let it run. To give you an idea, I let it run for about a half hour and got to 7% before deciding to let it be.

Volume Creation Wizard Volume Creation Wizard

Volume Creation Wizard Volume Creation Wizard

Volume Creation Wizard Volume Creation Wizard

Volume Creation Wizard Volume Creation Wizard

Volume Creation Wizard Volume Creation Wizard

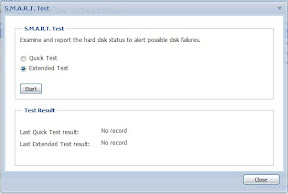
Once the volume was created, I wanted to make sure the disks were running in good order, so I ran an extended SMART Test on them. Granted, it’s not like a major stress test or anything, but it’s good to check what the drive’s reported condition is.

SMART Test

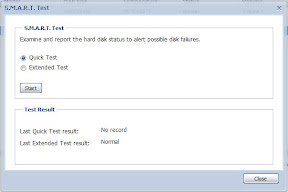
I let that run because the extended test takes 255 minutes. In the end, the results came back “Normal.”

SMART Test

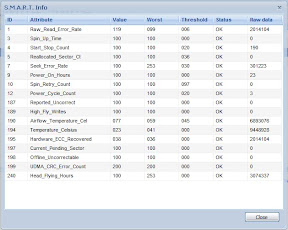
And here’s the detailed info for one of the drives:

Detailed info from SMART test

So, the disks seem to be working.

I noticed is that these particular drives are not always quiet. When they “woke up” the next morning (I left volume creation running overnight and logged in the next day), there was a noticeable amount of disk noise coming from them. I’d read a little about this in some of the user reviews. During the SMART Test, and even during the volume creation, they were reasonably quiet, but I/O can sometimes be a little noisy. They appear to test out, though, so if it’s just noise, I can handle that. It’s under my desk in the office, not sitting next to my TV while I’m watching a movie.

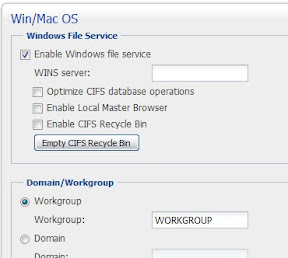
With the disks tested and ready for content, I had to make sure Windows file sharing was enabled. I also ensured the NAS was in the “WORKGROUP” workgroup so we can use our Windows credentials. (All of my machines are in the default “WORKGROUP” workgroup so this was fine.) Easy enough through the web console:

Enable Windows file service

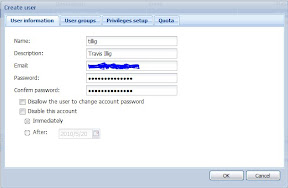
I then went in and created a user account on the system for all the users in the workgroup. I made sure to give them the same usernames and passwords as on the local machines so the Windows pass-through auth will work.

Create user

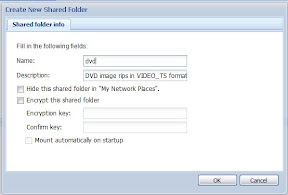
Finally, I had to create a shared folder for my DVDs to be stored in - also easy:

Create new shared folder

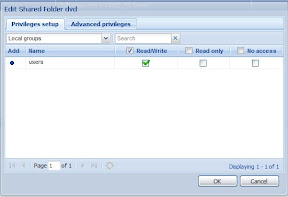
Set permissions on folder

Note that I left the permissions read/write for the default system group. Since all the users are in that group, it means everyone has read/write permissions, which, for my purposes, is perfect.

From a general user standpoint, the web-based management utility is really nice and clean. If you didn’t know better, you’d think you were using a native application. It’s a little more confusing than the WHS console, but then, it also does a lot more right out of the box.

Last thing to do is a little [really rough] speed test. I decided to copy a DVD rip I had made to both the home server and the new NAS. I used the speed estimation thing that shows up in the Windows copy dialog box, so it’s not, like “a benchmark” so much as a general indicator. Also, my laptop only has a 100 Mbit card on it so even though I’m connected to a gigabit switch, it’s negotiating down. (I tried a wireless N connection where I was getting 135 Mbit but various network interference and such, which is horrible in my house, ended up making it slower than a wired 100 Mbit connection.)

Write speed: Copying to Windows Home Server went between 10.5MB/sec and 10.8MB/sec, usually sticking around 10.7MB/sec. Copying to the Synology DS1010+ went between 10.6MB/sec and 11.1MB/sec, usually sticking at 11.0MB/sec. Not the major performance increase I thought it would be, but it’s a little faster.

Read speed: Copying from the Windows Home Server went between 10.9MB/sec and 11.2MB/sec. Copying from the Synology DS1010+ stuck pretty consistently between 11.1MB/sec and 11.3MB/sec. Again, not the major performance increase I thought it would be, but, again, a little faster.

Considering that I’m actually getting some level of data protection and a slight boost in speed, I can’t really complain. With my WHS setup, if a disk goes, I’m re-ripping. With the NAS, I’ve got a little RAID 5 overhead but I’m protected if a disk goes.

Also, again, it’s 100Mbit connection, so ostensibly with an actual gigabit connection I could get 10x the speed. I’d be curious to see the results with that. Maybe I’ll have to get a different adapter or try a different computer.

This sort of helps me in diagnosing some of the issues I’ve been seeing with Windows Media Center and DVD file sharing. I wonder now if maybe my media center PC is potentially a little underpowered to be driving a 1080p display. Maybe. I digress.

All in all, with the benefits listed earlier, I think this is a good move. I think the peace of mind alone will probably make up for the cost. Maybe that’s just me.

Anyway, I’m going to get my DVDs moved over to this and decommission some of the problem drives on my WHS and see how that goes.

UPDATE 5/6/2011: I had an opportunity to talk about my experience with the DS1010+ on the Hanselminutes podcast with Scott Hanselman.
windows comments edit

When you download a file from the internet and save it to your Windows computer, it “knows” where it came from and you have to right-click it and click an “Unblock” button to allow it to run. It’s a security thing, and generally it’s a good idea.

The "Unblock" button for downloaded
files.

What happens if you have 10, 100, or even 1000 different files you need to unblock?You don’t want to do that manually.

  1. Go download the SysInternals “Streams” utility.
  2. Run it on the files you want to unblock using the “-d” option and delete the alternate filestreams. It will look something like this if you’re unblocking a ton of help documents: streams -d *.chm

The reason this works is that the information about where you downloaded the file(s) from is stored in an alternate filestream. Nuking those alternate streams means Windows will think it’s a local file and will stop blocking it.

windows comments edit

I’m using Google Calendar Sync to keep my Outlook calendar and Google calendar synchronized and I’ve noticed a couple of meetings that don’t quite get synchronized right - the error message being “Participant is neither attendee  nor organizer.” (Yes, there are two spaces between “attendee” and “nor.”).

I haven’t figured out what the problem there is but I did find this interesting nugget to help you troubleshoot issues:

  1. Go to your Google Calendar log folder. On WinXP that’ll be like C:\Documents and Settings\YOURUSERNAME\Local Settings\Application Data\Google\Google Calendar Sync\logs
  2. Put a text file in there called “level.txt” and put one word in it: VERBOSE
  3. Run a sync from Google Calendar Sync. The log will come out a lot larger and will have a ton more logging information in it.
  4. Delete the “level.txt” file. You don’t want verbose logging all the time.

Interestingly, for me the appointments that won’t sync are all meetings that my boss organized. Is Google Calendar trying to tell me something? :)

UPDATE 5/27/10: I switched to gSyncit to sync my calendar.

Some of you reading this blog may have seen entries in the past talking about my experience with laser hair removal. After 30 treatments, I’m “done” and here are the results.

I did laser hair removal because my beard was so thick and coarse that I was having all nature of problems. I’d get really bad ingrown hairs if I let it get too long so my dermatologist told me I’d always have to be clean shaven or suffer the consequences. I destroyed pillowcases and the necks on my shirts. Since I had to keep it shaved anyway, I figured, why not get it removed?

Here are the links to the various blog entries from the treatments I documented: 1, 2, 3, 5, 6, 7, 9, 11, 12, 26.

I didn’t keep a timeline of photos after each treatment because… well, I didn’t really think about it, to be honest. I did do before and after, though, so here’s that.

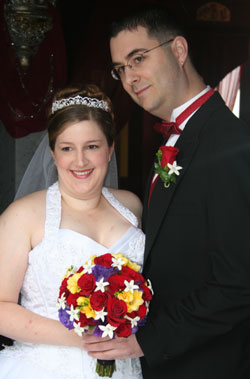
Before the treatment, you can see my beard in any picture. Here’s me in my wedding photo:

Jennifer and Travis Illig: October 14,
2006

That’s clean-shaven. Still a pretty dark beard line. I got some photos three treatments in that were closer, to see how the progress was going:

Left side, three treatments
in.

Right side, three treatments
in.

Front, three treatments
in.

You can see there’s a little bit of “patchiness” in the chin and a little on the sides. You can also see a couple of my famous ingrowns.

I got some pictures after four treatments in, too, to see if there was a difference across treatments:

Left side, four treatments
in.

Right side, four treatments
in.

Front, four treatments
in.

You’ll notice that between treatments three and four there wasn’t much change. It seemed that way for quite some time in the beginning. At that point we were using the Dermo Flash IPL (intense pulsed light) - it was good for thinning things down, but isn’t quite as effective at getting the thicker, coarser hair like I have in my beard. It was still important to do this, though, because using a laser to start (we tried a little in my first treatment) with was so insanely painful that anything to reduce the amount of hair that would be hit eventually by the laser was a good thing.

In the fifth treatment I resumed use of the actual laser (a MeDioStar) and it hurt like hell, but started getting better results. In later treatments, I think around the #18 time, we started alternating between a MeDioStar laser and a Syneron eLaser which shoots not only laser at the hair but also a pulse of radio frequency.

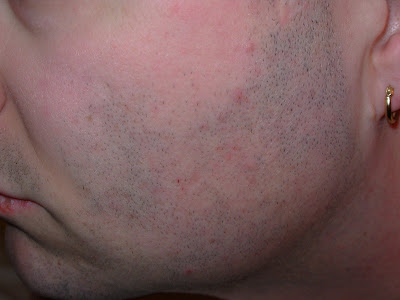
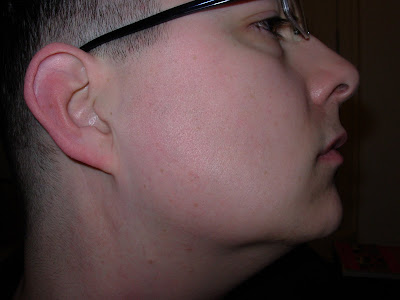
I ran for 30 treatments and here are my results:

Left side, after 30
treatments.

Right side, after 30
treatments.

Front, after 30
treatments.

You’ll notice that the sides and neck are pretty well clear, but there’s still some lingering around my lips and chin. The upper lip is the most painful area to get, so we didn’t focus as much on it as we probably could have. You also can’t get too close to the lips because you don’t want the laser hitting them. The chin was a stubborn area to begin with because the hairs are so plentiful and are at their thickest/coarsest there.

After about 26 treatments I started seeing diminishing returns so I decided after the end of my 30th I’d call it “good enough.” I don’t ruin shirts anymore, it doesn’t look patchy at the end of the day, and I’m free of ingrowns. Basically, success.

Notes based on my experience to people considering getting laser hair removal:

  • Prepare for the long haul. The clinic might sell you treatments in bundles of six or something, but you will probably need more than that, particularly in areas you have more hair and/or where the hair is coarse.
  • It hurts a LOT. I can’t understate this. You may hear people tell you “it’s like a rubber band snap.” The Dermo Flash IPL is actually like that - a quick snap and you’re done. (For me, about 10 quick snaps and you’re done.) On the other hand, it’s only really effective on the thinner hair, so if there’s any significant amount of hair, you’ll probably need something stronger like a laser. Lasers hurt really bad. I’ve heard of guys who have full back tattoos and have had laser hair removal and they said the laser hair removal hurt more. I don’t have any tattoos so I can’t vouch for that, but I think that says something. I can’t express it in words, really. It’s not like any other kind of pain I’ve experienced. Particularly in early treatments when there’s a lot of hair, it’s instant-eye-watering-please-I’ll-tell-you-anything-just-stop kind of pain. Once you get further in, it eases up, but some things still hurt. My upper lip makes me wince just thinking about it.
  • It only works well on dark hair. The basic premise of the thing is that the laser heat is drawn to the hair pigment. The heat transfers down through the hair and cooks the root. If you have blonde hair on light skin, you’re kind of hosed because there’s not much pigment for the heat to be drawn to. If you have dark skin, the heat can’t really differentiate between the hair pigment and your skin pigment. What this means for me is that areas where my beard was “salt and pepper” is now just “salt” - I have a few spots where there is some thick, coarse white hair. Laser hair removal will never get that.
  • Once you start, you’re committed. This is more for the folks doing visible areas like the face, but it’s good to be aware of. When the hair starts coming out, it’s not necessarily “even.” There were points where my beard looked a little like a zebra pattern because the hair was coming out in odd swatches. This lasted for around 15 treatments in the middle of my full series of treatments. Had I decided to quit, I’d have a really weirdly growing beard that you’d even notice when it was shaved. Once they start removing hair, you’re committed to the whole procedure, as long as it takes, because if you quit before the hair’s all gone it’ll be weird.
  • You will not end up hairless. You will still have to shave. I did not fully realize this at the outset, but I can see that it’s somewhat unavoidable. The combination of diminishing returns as I neared the 30th treatment and the white hairs in my beard that weren’t going to be removed anyway means no matter what I do, I’m still shaving. I have to assume that’s the case for anywhere - it’ll thin the hair down a lot, maybe enough that you don’t have to shave as often, but you’ll still have to shave.

Given all that, would I still do it? Yeah, I think I would. I like being able to look down and read a book in the evening without giving my own neck a rash or pilling up my shirt. I like being able to lie down and roll over without hearing a sandpaper noise that indicates my face is destroying another pillowcase. Just go in informed and knowing that it’s not going to be six months of pain-free treatments and you’ll be fine.

Note: I get a lot of comments on my laser hair removal entries that are spam, people trying to sell laser hair removal, or people telling me that their laser hair removal clinic would have done a better job. I will delete these non-constructive comments, so please save us all some time by not leaving them.

UPDATE 2/27/2012: I get a lot of questions about how I’ve fared since I wrote this entry nearly two years ago so I’ll answer them here:

  • Have I had any regrowth? A bit, but not a ton. My cheeks and neck are still really clear, just like in the photos. If I’ve had regrowth, it’s been in my lip/chin region, which, as you can see, didn’t come clear anyway.
  • Do I have to shave? Yes. I’ve always had to shave, even immediately following treatment. You won’t end up hairless.
  • Does it look patchy? Not as long as I stay shaved. Again, you don’t end up hairless, so you will have to keep yourself shaved. When I’m shaved you’d never notice that I had anything done at all except that I don’t have that super-dark beard line I used to have. When I wake up in the morning it is a little patchy looking, but not too bad. I wouldn’t go a full day or more without shaving, though.
  • Does it look feminine? Not from what I can tell. Like I said, it just looks like I’ve shaved. Shave your own face and decide if you look feminine. That’s your answer.
  • Would I do it again? Yes. I can’t tell you how much of a pain it was to be tearing up my shirt necks and sheets and such with the beard I had. Not having to deal with that has been worth it.

dotnet, gists, build comments edit

I’ve spent the last week working on getting NCover 3.4.2 (and, later, 3.4.3) working in my environment. I was previously using the older free NCover with the original NCoverExplorer reporting tasks, but in moving up to .NET 4, it was also time to move up to a newer NCover.

One of the shortcomings I’ve found with NCover is that it’s really hard to get a simple set of summary coverage numbers from inside the build script. It’s pretty well geared around dumping out reports and summaries in XML or HTML, but even then, the XML summaries don’t have all the numbers in an easily consumable format.

Further, the new division between the “Classic” licenses (ostensibly for the everyday dev) and the “Complete” licenses (for your build server) give us the fact that only the “Complete” license supports failing the build based on coverage. I’m not sure why, that’s just how it is. Oh, and the “Complete” license costs over twice what the “Classic” license costs, so it’s a little cost-prohibitive to buy all your devs a “Complete” license just so they can fail a local build.

Unfortunately, that doesn’t really work for me. I’m going to run unit tests on my local machine before I check my code into the repo so I don’t break the build. I kind of also want to know if I’m going to break the build because I went under the minimum coverage requirements.

Fortunately, you can do this, it’s just a little tricky. You’ll have to stick with me while we jump through a few hoops together.

I’m working with the following tools:

  • .NET 4.0
  • MSBuild (with the .NET 4.0 tools version)
  • NCover 3.4.3 Classic

The basic algorithm:

  1. Run your tests with the <NCover> MSBuild task and get your coverage numbers.
  2. Run the <NCoverReporting> MSBuild task to create a “SymbolModule”summary report.
  3. Use XSLT inside the <NCoverReporting> task to transform the output of the “SymbolModule” report into something you can more easily use with actual coverage percentages in it.
  4. Use the <XmlPeek> task to get the minimum coverage requirements out of the MSBuild script.
  5. Use the <WriteLinesToFile> task to create a temporary XML file that contains the minimum coverage requirements and the actual coverage information.
  6. Use the <XslTransformation> task to transform that temporary XML file into something that has simple pass/fail data in it.
  7. Use the <XmlPeek> task to look in that simplified report and determine if there are any failures.
  8. Use the <Error> task to fail the build if there are any coverage failures.

If this seems like a lot of hoops to jump through, you’re right. It’s a huge pain. Longer term, you could probably encapsulate steps 4 – 8 in a single custom MSBuild task, but for the purposes of explaining what’s going on (and trying to use things that come out of the box with MSBuild and NCover), I haven’t done that.

You may get lost here. Like I said, it’s a huge number of steps. At the end I put all the steps together in an MSBuild snippet so it might make more sense when you get there. I’ll walk you through the steps, and then I’ll show you the summary. Follow all the way through to the end. If you get bored and start skipping steps or skimming, you’ll miss something.

On with the show.

Run your tests with the <NCover> MSBuild task and get your coverage numbers.

Your build script will have some properties set up and you’ll use the <NCover> task to run NUnit or whatever. I won’t get into the details on this one because this is the easy part.

<PropertyGroup>
  <NCoverPath>$(ProgramW6432)\NCover\</NCoverPath>
  <TestCommandLineExe>$(ProgramW6432)\NUnit\NUnit-Console.exe</TestCommandLineExe>
  <RawCoverageFile>$(MSBuildProjectDirectory)\Coverage.Unit.xml</RawCoverageFile>
</PropertyGroup>
<UsingTask TaskName="NCover.MSBuildTasks.NCover" AssemblyFile="$(NCoverPath)Build Task Plugins\NCover.MSBuildTasks.dll"/>
<Target Name="Test">
  <!-- Define all of your unit test command line, the assemblies to profile, etc., then...-->
  <NCover
    ContinueOnError="false"
    ToolPath="$(NCoverPath)"
    TestRunnerExe="$(TestCommandLineExe)"
    TestRunnerArgs="$(TestCommandLineArgs)"
    IncludeAssemblies="@(AssembliesToProfile)"
    LogFile="Coverage.Unit.log"
    CoverageFile="$(RawCoverageFile)"
    ExcludeAttributes="CoverageExcludeAttribute;System.CodeDom.Compiler.GeneratedCodeAttribute"
    IncludeAutoGenCode="false"
    RegisterProfiler="false"/>
</Target>

In this example, when you run the Test target in your MSBuild script, NUnit will run and be profiled by NCover. You’ll get a data file out the back called “Coverage.Unit.xml” - remember where the coverage file output is, you’ll need it. I recommend setting an MSBuild variable with the location of your coverage file output so you can use it later.

Run the <NCoverReporting> MSBuild task to create a “SymbolModule”summary report.

At some time after you run the <NCover> task, you’re going to need to generate some nature of consumable report from the output. To do that, you’ll run the <NCoverReporting> task. For our purposes, we specifically want to create a “SymbolModule” report since we will be failing coverage based on overall assembly statistics.

You need to define the set of reports that will be run as a property in a <PropertyGroup> and pass that info to the <NCoverReporting> task. It will look something like this:

<PropertyGroup>
  <NCoverPath>$(ProgramW6432)\NCover\</NCoverPath>
  <RawCoverageFile>$(MSBuildProjectDirectory)\Coverage.Unit.xml</RawCoverageFile>
  <SimplifiedReportXsltPath>$(MSBuildProjectDirectory)\SimplifiedCoverageStatistics.xsl</SimplifiedReportXsltPath>
  <SimplifiedCoverageReportPath>$(MSBuildProjectDirectory)\CoverageReport.Simplified.xml</SimplifiedCoverageReportPath>
  <SimplifiedCoverageReportOutputs>
    <Report>
      <ReportType>SymbolModule</ReportType>
      <Format>Html</Format>
      <OutputPath>$(SimplifiedCoverageReportPath)</OutputPath>
    </Report>
  </SimplifiedCoverageReportOutputs>
  <MinimumCoverage>
    <Threshold>
      <CoverageMetric>SymbolCoverage</CoverageMetric>
      <Type>Assembly</Type>
      <Value>95.0</Value>
      <Pattern>YourAssembly</Pattern>
    </Threshold>
    <Threshold>
      <CoverageMetric>SymbolCoverage</CoverageMetric>
      <Type>Assembly</Type>
      <Value>95.0</Value>
      <Pattern>YourOtherAssembly</Pattern>
    </Threshold>
  </MinimumCoverage>
</PropertyGroup>
<UsingTask
  TaskName="NCover.MSBuildTasks.NCoverReporting"
  AssemblyFile="$(NCoverPath)Build Task Plugins\NCover.MSBuildTasks.dll"/>
<Target Name="CoverageReport">
  <NCoverReporting
    ContinueOnError="false"
    ToolPath="$(NCoverPath)"
    CoverageDataPaths="$(RawCoverageFile)"
    OutputPath="$(MSBuildProjectDirectory)"
    OutputReport="$(SimplifiedCoverageReportOutputs)"
    MinimumCoverage="$(MinimumCoverage)"
    XsltOverridePath="$(SimplifiedReportXsltPath)"
    />
</Target>

Now, there are a few interesting things to notice here.

  • There’s a variable called “SimplifiedReportXsltPath” that points to an XSLT file you don’t have yet. I’ll give that to you in a minute.
  • SimplifiedCoverageReportPath will eventually have the easy XML summary of the stuff we’re interested in. Keep that around.
  • SimplifiedCoverageReportOutputs variable follows the format for defining a report to generate as outlined in the NCover documentation. NCover Classic doesn’t support many reports, but SymbolModule is one it does support.
  • The SymbolModule report is defined as an Html format report rather than Xml. This is important because when we define it as “Html” then the report will automatically run through our XSLT to transform. The result of the transformation doesn’t actually have to be HTML.
  • The MinimumCoverage variable is defined in the format used to fail the build if you’re running under NCover Complete. This format is also defined in the documentation. The parameter as passed to the <NCoverReporting> task will be ignored if you run it under Classic but will actually act to fail the build if run under Complete. The point here is that we’ll be using the same definition for minimum coverage that <NCoverReporting> uses.
  • An XsltOverridePath is specified on the <NCoverReporting> task. This lets us use our custom XSLT (which I’ll give you in a minute) to create a nice summary report.

Use XSLT inside the <NCoverReporting> task to transform the output of the “SymbolModule” report into something you can more easily use with actual coverage percentages in it.

Basically, you need to create a little XSLT that will generate some summary numbers for you. The problem is, you will have to do some manual calculation to get those summary numbers.

The math is simple but a little undiscoverable. For symbol coverage, you’ll need to get the total number of sequence points available and the number visited, then calculate the percentage:

Coverage Percent = (Visited Sequence Points / (Unvisited Sequence Points + Visited Sequence Points)) * 100

Or, smaller:

cp = (vsp / (usp + vsp)) * 100

You can get the USP and VSP numbers for the entire coverage run or on a per-assembly basis by looking in the appropriate places in the SymbolModule report.

I won’t show you the XML that comes out of <NCoverReporting> natively, but I will give you the XSLT that will calculate this for you:

<?xml version="1.0" encoding="utf-8"?>
<xsl:stylesheet version="1.0" xmlns:xsl="http://www.w3.org/1999/XSL/Transform">
  <xsl:template match="/">
    <xsl:element name="symbolCoverage">
      <xsl:call-template name="display-symbol-coverage">
        <xsl:with-param name="key">__Summary</xsl:with-param>
        <xsl:with-param name="stats" select="//trendcoveragedata/stats" />
      </xsl:call-template>
      <xsl:for-each select="//trendcoveragedata/mod">
        <xsl:call-template name="display-symbol-coverage">
          <xsl:with-param name="key" select="assembly/text()" />
          <xsl:with-param name="stats" select="stats" />
        </xsl:call-template>
      </xsl:for-each>
    </xsl:element>
  </xsl:template>
  <xsl:template name="display-symbol-coverage">
    <xsl:param name="key" />
    <xsl:param name="stats" />
    <xsl:variable name="percentage" select="format-number(($stats/@vsp div ($stats/@usp + $stats/@vsp)) * 100, '0.00')" />
    <xsl:element name="coverage">
      <xsl:attribute name="module"><xsl:value-of select="$key" /></xsl:attribute>
      <xsl:attribute name="percentage">
        <xsl:choose>
          <xsl:when test="$percentage='NaN'">100</xsl:when>
          <xsl:otherwise><xsl:value-of select="$percentage" /></xsl:otherwise>
        </xsl:choose>
      </xsl:attribute>
    </xsl:element>
  </xsl:template>
</xsl:stylesheet>

Save that file as SimplifiedCoverageStatistics.xsl. That’s the SimplifiedReportXsltPath document we referred to earlier in MSBuild. When you look at the output of <NCoverReporting> after using this, the SymbolModule report you generated will look something like this:

<?xml version="1.0" encoding="utf-8"?>
<symbolCoverage>
  <coverage module="__Summary" percentage="95.36" />
  <coverage module="YourAssembly" percentage="91.34" />
  <coverage module="YourOtherAssembly" percentage="99.56" />
</symbolCoverage>

If you’re only reporting some statistics, you’re pretty much done. The special __Summary module is the overall coverage for the entire test run; each other module is an assembly that got profiled and its individual coverage. You could use the <XmlPeek> task from here and look in that file to dump out some numbers. For example, you can report out to TeamCity using a <Message> task and the __Summary number in that XML report.

However, if you want the build to fail based on coverage failure, you still have to compare those numbers to the expectations.

Use the <XmlPeek> task to get the minimum coverage requirements out of the MSBuild script.

You can’t just use the $(MinimumCoverage) variable directly because there’s no real way to get nested values from it. MSBuild sees that as an XML blob. (If it were an “Item” rather than a “Property” it’d be easier to manage, but NCover needs it as a “Property” so we’ve got work to do.) We’ll use <XmlPeek> to get the values out in a usable format. That <XmlPeek> call looks like this:

<XmlPeek
  Namespaces="&lt;Namespace Prefix='msb' Uri='http://schemas.microsoft.com/developer/msbuild/2003'/&gt;"
  XmlContent="&lt;Root xmlns='http://schemas.microsoft.com/developer/msbuild/2003'&gt;$(MinimumCoverage)&lt;/Root&gt;"
  Query="/msb:Root/msb:Threshold[msb:Type='Assembly']">
  <Output TaskParameter="Result" ItemName="ModuleCoverageRequirements" />
</XmlPeek>

More crazy stuff going on here.

First we have to define the MSBuild namespace on the <XmlPeek> task so we can do an XPath statement on the $(MinimumCoverage) property - again, it’s an XML blob.

Next, we’re specifying some “XmlContent” on that <XmlPeek> task because we have the variable already and we don’t need to re-read it from the file. However, it’s sort of an XML fragment because there may be several <Threshold> elements defined in the variable so we wrap the variable with a <Root> element so it’s a proper XML document.

The “Query” parameter uses some XPath to find all of the <Threshold> elements defined in $(MinimumCoverage) that are assembly-level thresholds. We can’t really do anything with, say, cyclomatic-complexity thresholds (at least, not in this article) so we’re only getting the values we can do something about.

Finally, we’re sticking the <Threshold> nodes we found into a @(ModuleCoverageRequirements) array variable. Each item in that array will be one <Threshold> node (as an XML string).

Use the <WriteLinesToFile> task to create a temporary XML file that contains the minimum coverage requirements and the actual coverage information.

We have the report at $(SimplifiedCoverageReportPath) that <NCoverReporting> generated containing the actual coverage percentages. We also have @(ModuleCoverageRequirements) with the associated required coverage percentages. Let’s create a single, larger XML document that has both of these sets of data in it. We can do that with an <XmlPeek> to get the nodes out of the simplified coverage report and then a <WriteLinesToFile> task:

<PropertyGroup>
  <BuildCheckCoverageReportPath>$(MSBuildProjectDirectory)\CoverageReport.BuildCheck.xml</BuildCheckCoverageReportPath>
</PropertyGroup>
<!-- Get the actuals out of the transformed summary report. -->
<XmlPeek
  XmlInputPath="$(SimplifiedCoverageReportPath)"
  Query="/symbolCoverage/coverage">
  <Output
    TaskParameter="Result"
    ItemName="ModuleCoverageActuals"/>
</XmlPeek>
<!-- Merge the requirements and actuals into a single document. -->
<WriteLinesToFile
  File="$(BuildCheckCoverageReportPath).tmp"
  Lines="&lt;BuildCheck&gt;&lt;Requirements&gt;;@(ModuleCoverageRequirements);&lt;/Requirements&gt;&lt;Actuals&gt;;@(ModuleCoverageActuals);&lt;/Actuals&gt;&lt;/BuildCheck&gt;"
  Overwrite="true" />

As you can see, we’re generating “yet another” XML document. It’s temporary, so don’t worry, but we do generate another document.

We’re using <XmlPeek> to get all of the <coverage> elements out of the simplified report we generated earlier. (Look up a little bit in the article to see a sample of what that report looks like.)

Finally, we use <WriteLinesToFile> to wrap some XML around the requirements and the actuals and generate a larger report. Notice we stuck a “.tmp” extension onto the actual file path in the “File”attribute on <WriteLinesToFile> - that’s important.

This temporary report will look something like this:

<BuildCheck>
  <Requirements>
    <Threshold xmlns="http://schemas.microsoft.com/developer/msbuild/2003">
      <CoverageMetric>SymbolCoverage</CoverageMetric>
      <Type>Assembly</Type>
      <Value>95.0</Value>
      <Pattern>YourAssembly</Pattern>
    </Threshold>
    <Threshold xmlns="http://schemas.microsoft.com/developer/msbuild/2003">
      <CoverageMetric>SymbolCoverage</CoverageMetric>
      <Type>Assembly</Type>
      <Value>95.0</Value>
      <Pattern>YourOtherAssembly</Pattern>
    </Threshold>
  </Requirements>
  <Actuals>
    <coverage module="__Summary" percentage="95.36" />
    <coverage module="YourAssembly" percentage="91.34" />
    <coverage module="YourOtherAssembly" percentage="99.56" />
  </Actuals>
</BuildCheck>

Use the <XslTransformation> task to transform that temporary XML file into something that has simple pass/fail data in it.

We need to take that temporary report and make it a little more easily consumable. We’ll use another XSLT to transform it.

First,save this XSLT as “BuildCheckCoverageStatistics.xsl”:

<?xml version="1.0" encoding="utf-8"?>
<xsl:stylesheet version="1.0" xmlns:xsl="http://www.w3.org/1999/XSL/Transform" xmlns:msb="http://schemas.microsoft.com/developer/msbuild/2003">
  <xsl:template match="/">
    <xsl:element name="symbolCoverage">
      <xsl:for-each select="/BuildCheck/Requirements/msb:Threshold[msb:Type='Assembly']">
        <xsl:variable name="module"><xsl:value-of select="msb:Pattern/text()" /></xsl:variable>
        <xsl:variable name="expected"><xsl:value-of select="msb:Value/text()" /></xsl:variable>
        <xsl:variable name="actual"><xsl:value-of select="/BuildCheck/Actuals/coverage[@module=$module]/@percentage" /></xsl:variable>
        <xsl:if test="$actual != ''">
          <xsl:element name="coverage">
            <xsl:attribute name="module"><xsl:value-of select="$module" /></xsl:attribute>
            <xsl:attribute name="expected"><xsl:value-of select="$expected" /></xsl:attribute>
            <xsl:attribute name="actual"><xsl:value-of select="$actual" /></xsl:attribute>
            <xsl:attribute name="pass">
              <xsl:choose>
                <xsl:when test="$actual >= $expected">true</xsl:when>
                <xsl:otherwise>false</xsl:otherwise>
              </xsl:choose>
            </xsl:attribute>
          </xsl:element>
        </xsl:if>
      </xsl:for-each>
    </xsl:element>
  </xsl:template>
</xsl:stylesheet>

What that XSLT does is look at the requirements and the actuals in the XML file and if it finds some actuals that match a defined requirement, it outputs a node with the name of the assembly, the expected and actual coverage percentages, and a simple pass/fail indicator.

The reason it doesn’t just include all of the requirements is that NCover Classic doesn’t allow you to merge the results from different test runs into a single data set. As such, we may need to run this transformation a few times over different data sets and we don’t want to fail the build just because there’s a requirement defined for an assembly that wasn’t tested in the given test run.

Now transform the temporary XML file using <XslTransformation> like this:

<PropertyGroup>
  <BuildCheckReportXsltPath>$(MSBuildProjectDirectory)\BuildCheckCoverageStatistics.xsl</BuildCheckReportXsltPath>
</PropertyGroup>
<XslTransformation
  OutputPaths="$(BuildCheckCoverageReportPath)"
  XmlInputPaths="$(BuildCheckCoverageReportPath).tmp"
  XslInputPath="$(BuildCheckReportXsltPath)" />

As an input, we’re taking that “.tmp” file we generated with <WriteLinesToFile> earlier. The “OutputPaths” attribute is the $(BuildCheckCoverageReportPath) that we defined earlier. The “XslInputPath” is the XSLT above.

The resulting report will be a nice, simple document like this:

<?xml version="1.0" encoding="utf-8"?>
<symbolCoverage>
  <coverage module="YourAssembly" expected="95.0" actual="91.34" pass="false" />
  <coverage module="YourOtherAssembly" expected="95.0" actual="99.56" pass="true" />
</symbolCoverage>

The top-level __Summary data is gone (because we’re only dealing with assembly-level requirements) and you can see easily what the expected and actual coverage percentages are. Even easier, there’s a “pass” attribute that tells you whether there was success.

Notice in my sample report that one of the assemblies passed and the other failed because it didn’t meet minimum coverage. We want to fail the build when that happens.

After the transformation, you should do a little cleanup. We have some little temporary files and, really, we only want one simplified report - the one we just generated. Use the <Delete> and <Move> tasks to do that cleanup:

<Delete Files="$(BuildCheckCoverageReportPath).tmp;$(SimplifiedCoverageReportPath)" />
<Move
  SourceFiles="$(BuildCheckCoverageReportPath)"
  DestinationFiles="$(SimplifiedCoverageReportPath)" />

The net result of that:

  • The .tmp file will be deleted.
  • The $(SimplifiedCoverageReportPath) will now be that final report with the pass/fail marker in it.

Use the <XmlPeek> task to look in that simplified report and determine if there are any failures.

With such a simple report, the <XmlPeek> call to see if there are any failing coverage items is fairly self explanatory:

<XmlPeek
  XmlInputPath="$(SimplifiedCoverageReportPath)"
  Query="/symbolCoverage/coverage[@pass!='true']">
  <Output TaskParameter="Result" ItemName="FailedCoverageItems"/>
</XmlPeek>

That gives us a new variable called @(FailedCoverageItems) where each item in the variable array has one node containing a failed coverage item.

Use the <Error> task to fail the build if there are any coverage failures.

Last step! Use <Error> with a “Condition” attribute to fail the build if there is anything found in @(FailedCoverageItems):

<Error
  Text="Failed coverage: @(FailedCoverageItems)"
  Condition="'@(FailedCoverageItems)' != ''" />

That’ll do it!

If we put all of the MSBuild together, it’ll look something like the following.

NOTE: THIS IS NOT A COPY/PASTE READY SCRIPT. IT WILL NOT RUN BY ITSELF. IT IS A SAMPLE ONLY.

<PropertyGroup>
  <NCoverPath>$(ProgramW6432)\NCover\</NCoverPath>
  <RawCoverageFile>$(MSBuildProjectDirectory)\Coverage.Unit.xml</RawCoverageFile>
  <SimplifiedReportXsltPath>$(MSBuildProjectDirectory)\SimplifiedCoverageStatistics.xsl</SimplifiedReportXsltPath>
  <BuildCheckReportXsltPath>$(MSBuildProjectDirectory)\BuildCheckCoverageStatistics.xsl</BuildCheckReportXsltPath>
  <BuildCheckCoverageReportPath>$(MSBuildProjectDirectory)\CoverageReport.BuildCheck.xml</BuildCheckCoverageReportPath>
  <SimplifiedCoverageReportPath>$(MSBuildProjectDirectory)\CoverageReport.Simplified.xml</SimplifiedCoverageReportPath>
  <SimplifiedCoverageReportOutputs>
    <Report>
      <ReportType>SymbolModule</ReportType>
      <Format>Html</Format>
      <OutputPath>$(SimplifiedCoverageReportPath)</OutputPath>
    </Report>
  </SimplifiedCoverageReportOutputs>
  <MinimumCoverage>
    <Threshold>
      <CoverageMetric>SymbolCoverage</CoverageMetric>
      <Type>Assembly</Type>
      <Value>95.0</Value>
      <Pattern>YourAssembly</Pattern>
    </Threshold>
    <Threshold>
      <CoverageMetric>SymbolCoverage</CoverageMetric>
      <Type>Assembly</Type>
      <Value>95.0</Value>
      <Pattern>YourOtherAssembly</Pattern>
    </Threshold>
  </MinimumCoverage>
</PropertyGroup>
<UsingTask TaskName="NCover.MSBuildTasks.NCoverReporting" AssemblyFile="$(NCoverPath)Build Task Plugins\NCover.MSBuildTasks.dll"/>
<Target Name="CoverageReport">
  <!-- This assumes you've run the NCover task, etc. and have a $(RawCoverageFile) to report on. -->
  <NCoverReporting
    ContinueOnError="false"
    ToolPath="$(NCoverPath)"
    CoverageDataPaths="$(RawCoverageFile)"
    OutputPath="$(MSBuildProjectDirectory)"
    OutputReport="$(SimplifiedCoverageReportOutputs)"
    MinimumCoverage="$(MinimumCoverage)"
    XsltOverridePath="$(SimplifiedReportXsltPath)"
    />
  <XmlPeek
    Namespaces="&lt;Namespace Prefix='msb' Uri='http://schemas.microsoft.com/developer/msbuild/2003'/&gt;"
    XmlContent="&lt;Root xmlns='http://schemas.microsoft.com/developer/msbuild/2003'&gt;$(MinimumCoverage)&lt;/Root&gt;"
    Query="/msb:Root/msb:Threshold[msb:Type='Assembly']">
    <Output TaskParameter="Result" ItemName="ModuleCoverageRequirements" />
  </XmlPeek>
  <XmlPeek XmlInputPath="$(SimplifiedCoverageReportPath)" Query="/symbolCoverage/coverage">
    <Output TaskParameter="Result" ItemName="ModuleCoverageActuals"/>
  </XmlPeek>
  <WriteLinesToFile
    File="$(BuildCheckCoverageReportPath).tmp"
    Lines="&lt;BuildCheck&gt;&lt;Requirements&gt;;@(ModuleCoverageRequirements);&lt;/Requirements&gt;&lt;Actuals&gt;;@(ModuleCoverageActuals);&lt;/Actuals&gt;&lt;/BuildCheck&gt;"
    Overwrite="true" />
  <XslTransformation
    OutputPaths="$(BuildCheckCoverageReportPath)"
    XmlInputPaths="$(BuildCheckCoverageReportPath).tmp"
    XslInputPath="$(BuildCheckReportXsltPath)" />
  <Delete Files="$(BuildCheckCoverageReportPath).tmp;$(SimplifiedCoverageReportPath)" />
  <Move
    SourceFiles="$(BuildCheckCoverageReportPath)"
    DestinationFiles="$(SimplifiedCoverageReportPath)" />
  <XmlPeek
    XmlInputPath="$(SimplifiedCoverageReportPath)"
    Query="/symbolCoverage/coverage[@pass!='true']">
    <Output TaskParameter="Result" ItemName="FailedCoverageItems"/>
  </XmlPeek>
  <Error
    Text="Failed coverage: @(FailedCoverageItems)"
    Condition="'@(FailedCoverageItems)' != ''" />
</Target>

There are exercises left to the reader. THIS IS NOT A COPY/PASTE READY SCRIPT.

There are some obvious areas where you’ll need to make some choices. For example, you probably don’t actually want to dump all of these reports out right in the same folder as the MSBuild script so you’ll want to set various paths appropriately. You may want to put the <NCoverReporting> task call in a separate target than the crazy build-time-analysis bit to try and keep things manageable and clean. Filenames may need to change based on dynamic variables, like if you’re running the reporting task after each solution in a multi-solution build, so you’ll have to adjust for that. This should basically get you going.

Remind me again… WTF? Why all these hoops?

NCover Classic won’t let you fail the build based on coverage. I have my thoughts on that and other shortcomings that I’ll save for a different blog entry. Suffice it to say, without creating a custom build task to encompass all of this, or just abandoning hope for failing the build based on coverage, this is about all you can do. Oh, or you could buy every developer in your organization an NCover Complete license.

HELP! Why doesn’t XYZ work for me?

Unfortunately, there are a lot of moving pieces here. If it’s not working for you, I don’t really have the ability to offer you individual support on it. If you find a problem, leave a comment on this blog entry and I’ll look into it; if you grabbed all of these things and your copy isn’t quite doing what you think it should be doing, I can’t really do anything for you. From a troubleshooting perspective, I’d add the various build tasks one at a time and run the build after each addition. Look and see what the output is, what files are created, etc. Use <Message> and <Error> tasks to debug the script. Make sure you’re 100% aware of what each call does and where every file is going. Make sure you specified all the properties for <NCoverReporting> correctly and you didn’t leave a typo in the minimum coverage or report output properties (e.g., make sure the SymbolModule report is an “Html” not “Xml” report, etc.) There are a lot of steps, but they’re simple steps, so you should be able to work through it.

Also, drop NCover a line and let them know you’d be interested in seeing better direct support for something like this. I’ve told them myself, but the more people interested in it, the more likely it will see light in the next product release.